Firmware Update Center
THANK YOU FOR CHOOSING PAC AS YOUR INTEGRATION SOLUTION.
Follow the steps outlined under your product to update firmware on your interface.
This will ensure optimal performance and latest features for your interface while enabling it to work in the latest vehicle applications.
This process is intended to be performed by an authorized dealer only.
**Note: PAC firmware is compatible with Windows 7, 8, and 10**
Select a Product
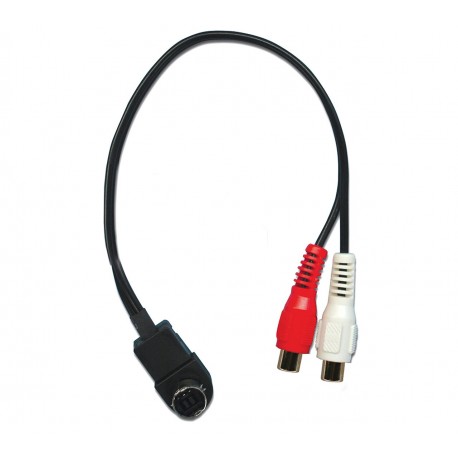
AAI-ALPA
Auxiliary Audio Input Cable for Alpine AI-Net Equipped Radios
-
Firmware Download, Version 1.0 (Released on May 7th, 2019)DownloadRelease NotesTest Link Download
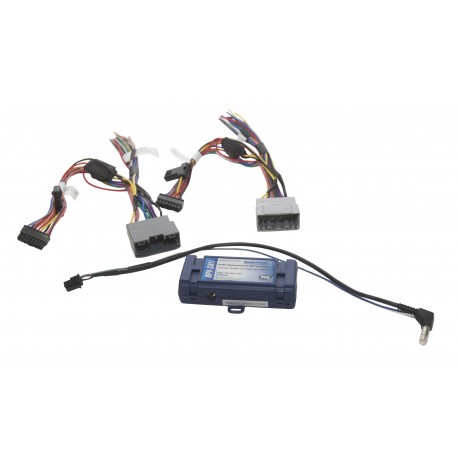
AP4-CH21
AmpPRO 4
Installation Instructions
- Download the latest version of the AmpPRO PC Application. It is VERY important that you use the latest version.
- Download the latest version of our firmware.
- Extract the firmware file and setup file from the .ZIP files that were just downloaded.
- Connect the interface to the computer's USB port and install the update.
Detailed Instructions
- If this is the first time using the AmpPRO PC Application, run and install “amppro_setup.exe”. This will install the PC Application onto the computer. The AmpPRO program will then install the update files from the computer to the interface.
- Open the AmpPRO PC Application using the new shortcut created on your desktop.
- Connect the interface to the computer using a standard to micro USB cable.
- Click the "Firmware" icon.
- Click “Select File” and browse to the new firmware file. The new firmware can be found where you saved it before beginning.
- Once the file is chosen the update will begin. When successful it will show the text "Update Completed".
-
Firmware Download, Version V12 (Released on August 11th, 2017)DownloadRelease Notes
- Adds “Two Channel Mode” on Dip1
- Reduces audio delay from ~14ms to ~1ms
- Fixes missing Bluetooth audio when radio is turned off
- Adds “Two Channel Mode” on Dip1
-
Firmware Download, Version V9 (Released on January 27th, 2017)DownloadRelease Notes
- Initial Release
-
Utility/Other, Version V12 (Released on July 31st, 2018)DownloadRelease NotesAmpPRO PC Application
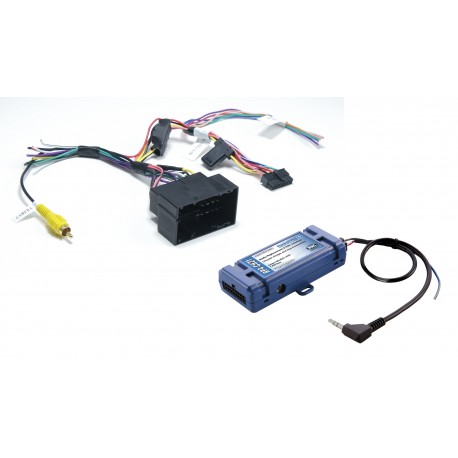
AP4-CH31
AmpPRO 4
Installation Instructions
- Download the latest version of the AmpPRO PC Application. It is VERY important that you use the latest version.
- Download the latest version of our firmware.
- Extract the firmware file and setup file from the .ZIP files that were just downloaded.
- Connect the interface to the computer's USB port and install the update.
Detailed Instructions
- If this is the first time using the AmpPROPC Application, run and install “ampproexe”. This will install the PC Application onto the computer. The AmpPRO program will then install the update files from the computer to the interface.
- Open the AmpPROPC Application using the new shortcut created on your desktop.
- Connect the interface to the computer using a standard to micro USB
- Click the "Firmware" icon.
- Click “Select File” and browse to the new firmware file. The new firmware can be found where you saved it before beginning.
- Once the file is chosen the update will begin. When successful it will show the text "Update Completed".
-
Firmware Download, Version V3 (Released on August 11th, 2017)DownloadRelease Notes
- Adds “Two Channel Mode” on Dip1
- Reduces audio delay from ~14ms to ~1ms
- Adds “Two Channel Mode” on Dip1
-
Firmware Download, Version V1 (Released on February 2nd, 2017)DownloadRelease Notes
- Initial Release
-
Utility/Other, Version V12 (Released on July 31st, 2018)DownloadRelease NotesAmpPRO PC Application
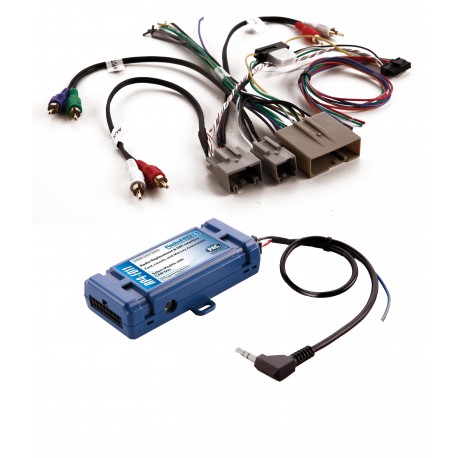
AP4-CH41
AmpPRO 4
Installation Instructions
- Download the latest version of the AmpPRO PC Application. It is VERY important that you use the latest version.
- Download the latest version of our firmware.
- Extract the firmware file and setup file from the .ZIP files that were just downloaded.
- Connect the interface to the computer's USB port and install the update.
Detailed Instructions
- If this is the first time using the AmpPROPC Application, run and install “ampproexe”. This will install the PC Application onto the computer. The AmpPRO program will then install the update files from the computer to the interface.
- Open the AmpPROPC Application using the new shortcut created on your desktop.
- Connect the interface to the computer using a standard to micro USB
- Click the "Firmware" icon.
- Click “Select File” and browse to the new firmware file. The new firmware can be found where you saved it before beginning.
- Once the file is chosen the update will begin. When successful it will show the text "Update Completed".
-
Firmware Download, Version V9 (Released on August 11th, 2017)DownloadRelease Notes
- Adds “Two Channel Mode” on Dip1
- Fixes issues seen with Blind Spot and Collision warning chimes
- Reduces audio delay from ~14ms to ~1ms
- Adds “Two Channel Mode” on Dip1
-
Firmware Download, Version V7 (Released on March 14th, 2017)DownloadRelease Notes
- Fixes issue found where front park sense chimes were not being retained when using TOSLINK output in Ram trucks.
- Fixes issue where the EQ values were not being refreshed after coming out of sleep mode.
- Fixes issue found where front park sense chimes were not being retained when using TOSLINK output in Ram trucks.
-
Firmware Download, Version V6 (Released on February 14th, 2017)DownloadRelease Notes
- Fixes an issue found where some voice prompts were inconsistent
- Fixes an issue found where some voice prompts were inconsistent
-
Firmware Download, Version V5 (Released on January 27th, 2017)DownloadRelease Notes
- Initial Release
-
Utility/Other, Version V12 (Released on July 31st, 2018)DownloadRelease NotesAmpPRO PC Application
AP4-FD11
AmpPRO 4
-
Utility/Other, Version V12 (Released on July 31st, 2018)DownloadRelease NotesAmpPRO PC Application
AP4-FD21
AmpPRO 4
Installation Instructions
- Download the latest version of the AmpPRO PC Application. It is VERY important that you use the latest version.
- Download the latest version of our firmware.
- Extract the firmware file and setup file from the .ZIP files that were just downloaded.
- Connect the interface to the computer's USB port and install the update.
Detailed Instructions
- If this is the first time using the AmpPROPC Application, run and install “ampproexe”. This will install the PC Application onto the computer. The AmpPRO program will then install the update files from the computer to the interface.
- Open the AmpPROPC Application using the new shortcut created on your desktop.
- Connect the interface to the computer using a standard to micro USB
- Click the "Firmware" icon.
- Click “Select File” and browse to the new firmware file. The new firmware can be found where you saved it before beginning.
- Once the file is chosen the update will begin. When successful it will show the text "Update Completed".
-
Firmware Download, Version V14 (Released on August 11th, 2017)DownloadRelease Notes
- Adds “Two Channel Mode” on Dip1
- Reduces audio delay from ~14ms to ~1ms
- Adds “Two Channel Mode” on Dip1
-
Firmware Download, Version V11 (Released on March 16th, 2017)DownloadRelease Notes
- Fixes issue with Rear Cross Path Detection Chime not working
- Fixes issue with Rear Cross Path Detection Chime not working
-
Firmware Download, Version V9 (Released on January 27th, 2017)DownloadRelease Notes
- Initial Release
-
Utility/Other, Version V12 (Released on July 31st, 2018)DownloadRelease NotesAmpPRO PC Application
AP4-TY11
AmpPRO 4
-
Utility/Other, Version V12 (Released on July 31st, 2018)DownloadRelease NotesAmpPRO PC Application
AP4-TY12
AmpPRO 4
Installation Instructions
- Download the latest version of the AmpPRO PC Application. It is VERY important that you use the latest version.
- Download the latest version of our firmware.
- Extract the firmware file and setup file from the .ZIP files that were just downloaded.
- Connect the interface to the computer's USB port and install the update.
Detailed Instructions
- If this is the first time using the AmpPRO PC Application, run and install “amppro_setup.exe”. This will install the PC Application onto the computer. The AmpPRO program will then install the update files from the computer to the interface.
- Open the AmpPRO PC Application using the new shortcut created on your desktop.
- Connect the interface to the computer using a standard to micro USB cable.
- Click the "Firmware" icon.
- Click “Select File” and browse to the new firmware file. The new firmware can be found where you saved it before beginning.
- Once the file is chosen the update will begin. When successful it will show the text "Update Completed".
BCI-CH21
Backup Camera/Navigation Unlock Interface
Installation Instructions
- Download the latest version of the BCI PC Application. It is VERY important that you use the latest version.
- Download the latest version of our firmware.
- Extract the firmware file and setup file from the .ZIP files that were just downloaded.
- Connect the interface to the computer's USB port and install the update.
Detailed Instructions
- If this is the first time using the BCIPC Application, run and install “bciexe”. This will install the PC Application onto the computer. The BCI program will then install the update files from the computer to the interface.
- Open the BCIPC Application using the new shortcut created on your desktop.
- Connect the BCIinterface to the computer using a standard to micro USB
- Click the "Firmware" icon.
- Click “Select File” and browse to the new firmware file. The new firmware can be found where you saved it before beginning.
- Once the file is chosen the update will begin. When successful it will show the text "Update Completed".
-
Firmware Download, Version 1.1.1.9 (Released on June 28th, 2017)DownloadRelease Notes
New Features
-Added BCI App support for:
---Front Camera Control
---Rear Camera Control
---Programmable Outputs 1, 2, 3
---New programmable outputs provide control of other accessories
-Added “On-Demand Activation”
-Added a reset, push and hold for 5s
-Updated LED Operation
Fixes
-Audio cutting out when manually activating reverse camera when using Uconnect “USB, BT” to listen to audio
-
Firmware Download, Version 1.1.1.6 (Released on September 1st, 2016)DownloadRelease NotesAdds VS41 support for Blind Spot and Front Cameras
-
Firmware Download, Version 1.1.2 (Released on August 10th, 2015)DownloadRelease NotesInitial Release
-
Utility/Other, Version V6 (Released on November 21st, 2017)DownloadRelease NotesBCI PC Application
BCI-CH41
Backup Camera/Navigation Unlock Interface
Installation Instructions
- Download the latest version of the BCI PC Application. It is VERY important that you use the latest version.
- Download the latest version of our firmware.
- Extract the firmware file and setup file from the .ZIP files that were just downloaded.
- Connect the interface to the computer's USB port and install the update.
Detailed Instructions
- If this is the first time using the BCIPC Application, run and install “bciexe”. This will install the PC Application onto the computer. The BCI program will then install the update files from the computer to the interface.
- Open the BCIPC Application using the new shortcut created on your desktop.
- Connect the BCIinterface to the computer using a standard to micro USB
- Click the "Firmware" icon.
- Click “Select File” and browse to the new firmware file. The new firmware can be found where you saved it before beginning.
- Once the file is chosen the update will begin. When successful it will show the text "Update Completed".
-
Firmware Download, Version 14 (Released on August 1st, 2017)DownloadRelease Notes
-Added BCI App support for:
---Front Camera Control
---Blind Spot Camera Control
---Programmable Outputs 1, 2, 3
---Swap Source and Preset SWC
---Swap Track and Volume SWC
---Remote Start Restore Climate
---ECO Memory
---Start Stop Memory
---Preset EQ
---Sport Mode Memory
-Added support for On-Demand Activation (Requires v3 Harness)
Fixes:
-Front camera on by park assist not working in 2017 Grand Cherokee
-Programming Reverse Camera in 2017 Challenger, Charger and 300
-User options not being saved when trying to save to the initial default values
-
Firmware Download, Version 9 (Released on February 16th, 2016)DownloadRelease NotesInitial Release
-
Utility/Other, Version V6 (Released on November 21st, 2017)DownloadRelease NotesBCI PC Application
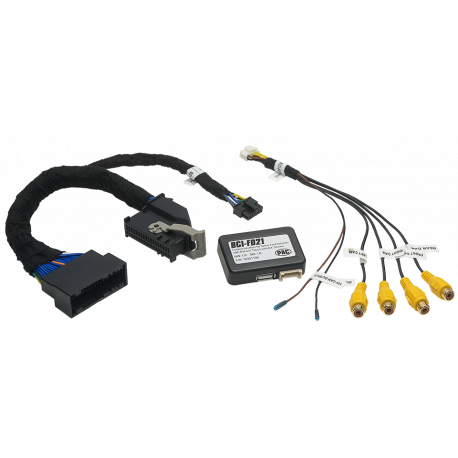
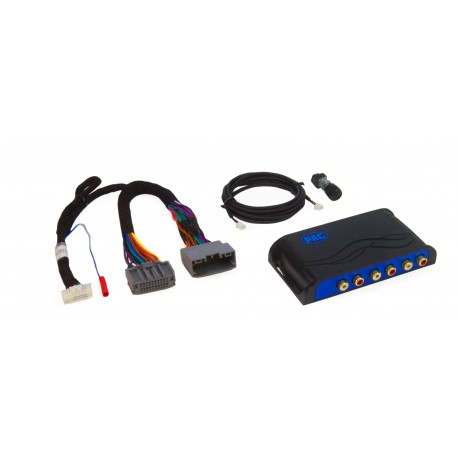
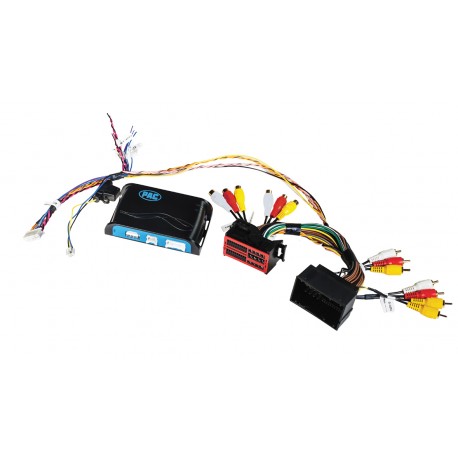
BCI-FD21
Backup Camera Interface with Camera Switcher
Overview
This process requires a thumb drive, formatted to FAT32, a specific firmware file, and access to the BCI-FD21 module. Through the steps outlined below, you can update the firmware on the module to the most current revision
Pre-Update Preparation
- Use a PC to format a USB thumb drive using FAT32 file system (default setting).
- Download the latest version of firmware.
- RIGHT-CLICK and select "Save link as..."
- Extract the firmware file from the .zip file that was just downloaded.
- Load the firmware file (FT_RCFM.faa) onto the root of a thumb drive.
- Note: The file name must remain exactly FT_RCFM.faa Any additional characters (i.e. FT_RCFM(1).faa) will prevent the successful update of the module.
- Note the current DIP switch configuration. The DIP switches will need to be returned to this configuration after the firmware update is complete.
Firmware Update Process
- Disconnect the BCI-FD21 module from the vehicle harness
- Set the DIP switches according the diagram below
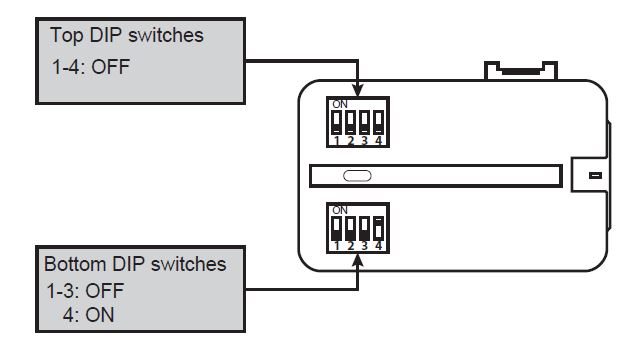
- Insert the thumb drive with firmware file into the module’s USB port.
- Connect the BCI-FD21 module to the vehicle harness.
- The update will begin at this time.
- While the module is updating the firmware from the USB port, the LED will flash purple.
DO NOT REMOVE THE USB DRIVE UNTIL THIS LED STOPS FLASHING. - When the LED stops flashing, the update process is complete.
- Remove the BCI-FD21 module from the vehicle harness.
- Remove the USB thumb drive.
- Reset the DIP switches to the appropriate configuration for your installation. (Noted earlier).
- Connect the BCI-FD21 module to the vehicle harness, and verify proper operation.
-
Firmware Download, Version v1.3 (Released on March 7th, 2017)DownloadRelease Notes
- Fixes reverse camera activation in manual transmission vehicles such as Mustang and Focus.
- Changes function of DIP 4 in Camera Input Configuration table to affect video display function when forcing view of rear camera while in motion.
- ON Position: The OE Rear Camera Display will return to Radio Function Screen when vehicles reaches 7mph. This setting is recommended for vehicles that shut down the 12V power supply to the OE rear camera over 7mph.
- OFF Position: You can force and watch the rear camera over 7mph at any time. Recommended for vehicles that do not shut down the 12V power supply to the OE rear camera over 7mph.
-
Firmware Download, Version v1.2 (Released on February 7th, 2017)DownloadRelease Notes
- Adds support for PTBA (Pro Trailer Back-up Assist) in newer Ford vehicles.
- Adds support for PTBA (Pro Trailer Back-up Assist) in newer Ford vehicles.
-
Firmware Download, Version v1.1 (Released on July 29th, 2016)DownloadRelease Notes
- Initial Release
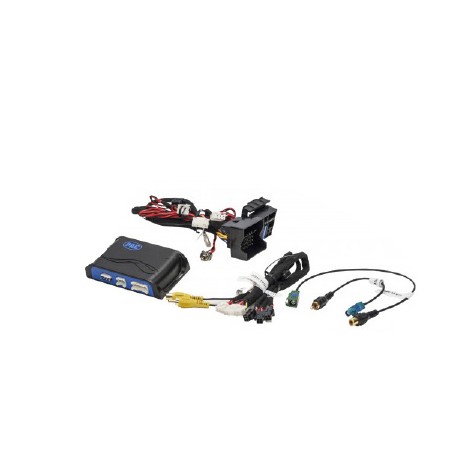
BCI-MB11
Backup Camera Interface and Controller for 2014-2016 Mercedes Sprinter and Metris Vans
-
Firmware Download, Version V6 (Released on November 21st, 2017)DownloadRelease NotesBCI PC Application
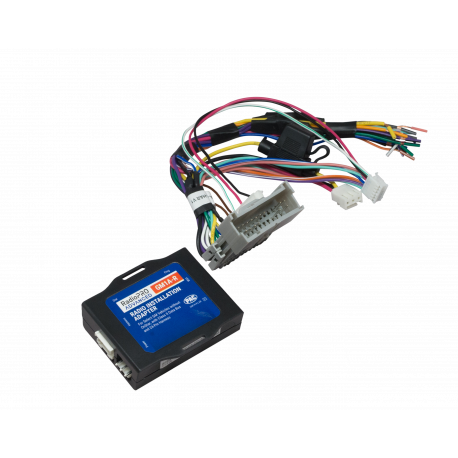
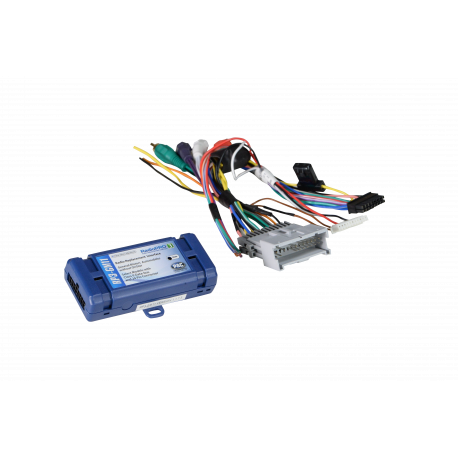
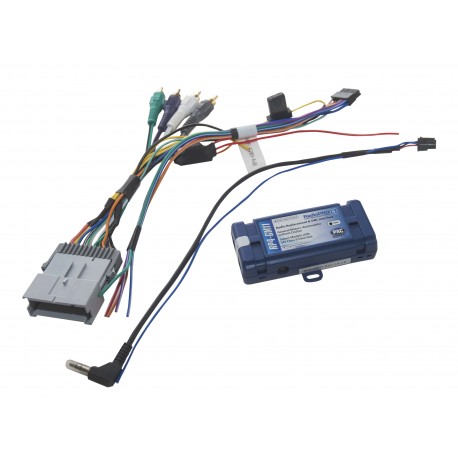
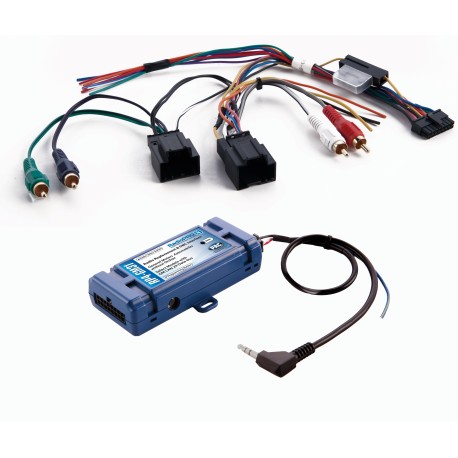
GM1A-R
RadioPRO Advanced Interface for General Motors Vehicles
INSTALLATION INSTRUCTIONS
- If this is the first time using the RadioPRO PC Application, download “radiopro_setup.zip”.
- Download the firmware file.
- Extract the Radio PRO PC Application file, then run the installer. This will install the PC Application onto the computer.
- Open the RadioPRO PC Application using the new shortcut created on your desktop.
- Connect the GM1A interface to the computer using a standard to micro USB cable.
- Click the "Firmware" icon.
- Click “Select File” and browse to the new firmware file. The new firmware can be found where you saved it before beginning.
- Once the file is chosen the update will begin. When successful it will show the text "Update Completed".
-
Firmware Download, Version V5 (Released on January 9th, 2019)DownloadRelease Notes
- Improves general functionality
-
Firmware Download, Version V4 (Released on July 3rd, 2018)DownloadRelease Notes
- Initial Release
-
Utility/Other, Version V14 (Released on October 23rd, 2017)DownloadRelease NotesRadioPRO PC Application
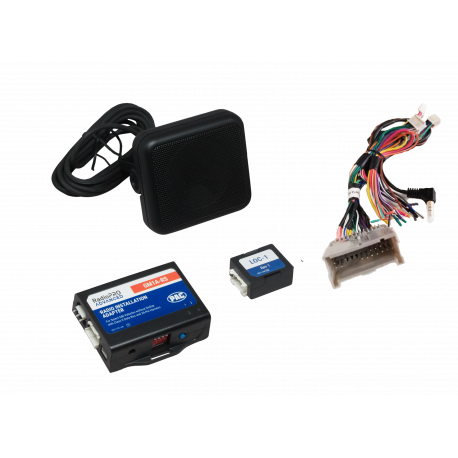
GM1A-RS
RadioPRO Advanced Interface for General Motors Vehicles
INSTALLATION INSTRUCTIONS
- If this is the first time using the RadioPRO PC Application, download “radiopro_setup.zip”.
- Download the firmware file.
- Extract the Radio PRO PC Application file, then run the installer. This will install the PC Application onto the computer.
- Open the RadioPRO PC Application using the new shortcut created on your desktop.
- Connect the GM1A interface to the computer using a standard to micro USB cable.
- Click the "Firmware" icon.
- Click “Select File” and browse to the new firmware file. The new firmware can be found where you saved it before beginning.
- Once the file is chosen the update will begin. When successful it will show the text "Update Completed".
-
Firmware Download, Version V7 (Released on January 9th, 2019)DownloadRelease Notes
- Improves general functionality
-
Firmware Download, Version V4 (Released on July 3rd, 2018)DownloadRelease Notes
- Initial Release
-
Utility/Other, Version V14 (Released on October 23rd, 2017)DownloadRelease NotesRadioPRO PC Application
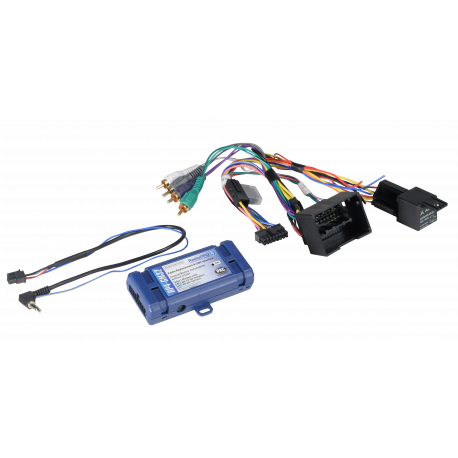
GM1A-RST
RadioPRO Advanced Interface for General Motors Vehicles
-
Firmware Download, Version V8 (Released on November 5th, 2018)DownloadRelease Notes
- Fixes audio issues with factory amplified systems
- Fixes issues seen with OnStar audio
-
Firmware Download, Version V6 (Released on October 18th, 2018)DownloadRelease Notes
- Initial Release
-
Utility/Other, Version V14 (Released on October 23rd, 2017)DownloadRelease NotesRadioPRO PC Application
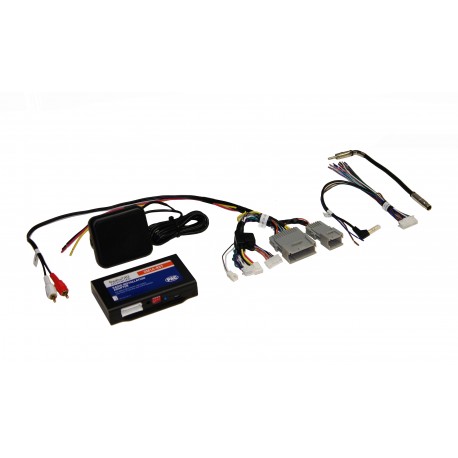
GM1A-RT
RadioPRO Advanced Interface for General Motors Vehicles
-
Firmware Download, Version V7 (Released on November 5th, 2018)DownloadRelease Notes
- Fixes audio issues with factory amplified systems
- Fixes issues seen with OnStar audio
-
Firmware Download, Version V7 (Released on October 18th, 2018)DownloadRelease Notes
- Initial Release
-
Utility/Other, Version V14 (Released on October 23rd, 2017)DownloadRelease NotesRadioPRO PC Application
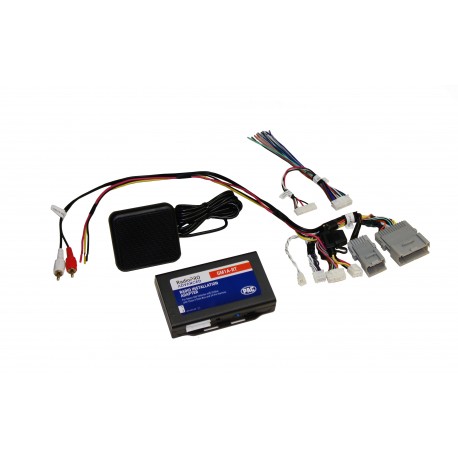
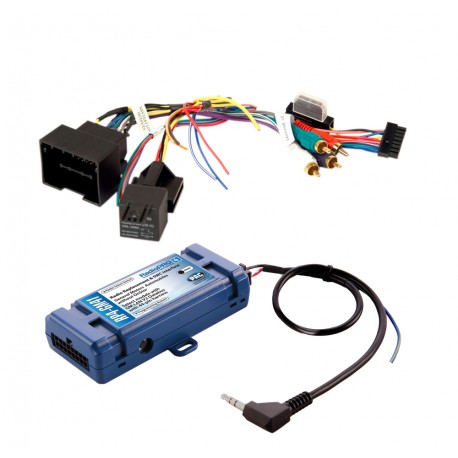
GM1A-RX
RadioPRO Advanced Interface for General Motors Vehicles
INSTALLATION INSTRUCTIONS
- If this is the first time using the RadioPRO PC Application, download “radiopro_setup.zip”.
- Download the firmware file.
- Extract the Radio PRO PC Application file, then run the installer. This will install the PC Application onto the computer.
- Open the RadioPRO PC Application using the new shortcut created on your desktop.
- Connect the GM1A interface to the computer using a standard to micro USB cable.
- Click the "Firmware" icon.
- Click “Select File” and browse to the new firmware file. The new firmware can be found where you saved it before beginning.
- Once the file is chosen the update will begin. When successful it will show the text "Update Completed".
-
Firmware Download, Version V5 (Released on January 9th, 2019)DownloadRelease Notes
- Improves general functionality
-
Firmware Download, Version V4 (Released on July 3rd, 2018)DownloadRelease Notes
- Initial Release
-
Utility/Other, Version V14 (Released on October 23rd, 2017)DownloadRelease NotesRadioPRO PC Application
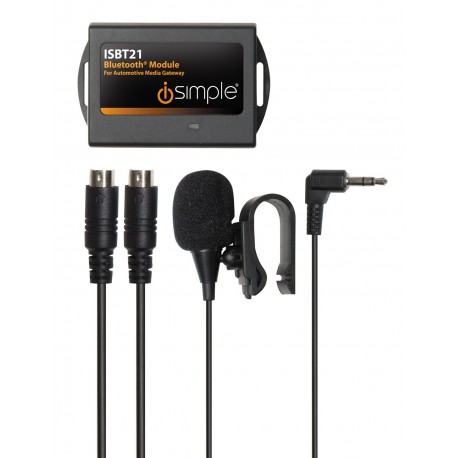
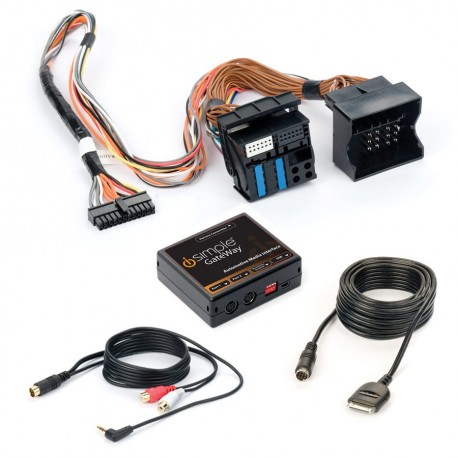
ISBT21
BluStream for GateWay
Important Information
Vista & 7 64-bit Users - we have received compatibility reports from users operating under the Vista & 7 64-bit OS. No such problems have been reported with Vista or 7 32-bit OS. Please use Vista or 7 32-bit when updating drivers.
Requirements Before You Begin
- PC or Laptop running Windows XP, Vista or 7 (32 bit ONLY) **NOT compatible with any other operating systems
- Administrative rights on the Windows computer - This is required for installing the USB driver pack and updating software
- Standard to 5-Pin mini USB cable
- Disable any Pop-up blockers you have enabled on your browser.
-
Firmware Download, Version .33 (Released on August 6th, 2010)DownloadRelease Notes
Includes: Product Firmware, Installation Instructions and Updating Software.
- Adds 2007+ Cadillac Escalade, Honda, Nissan, Subaru & Toyota Applications

ISFD531
DuaLink Kit for Select Ford, Lincoln, Mercury Vehicles
-
Firmware Download, Version 1.0.2.7F (Released on January 4th, 2012)DownloadRelease Notes
Gateway Update Software Package
Contains updater program and user instructions
ISFD571
GateWay Kit for Ford
Gateway Firmware Updater
The Gateway Firmware Updater will download the most recent firmware directly from iSimple. Ensuring you have the most up-to-date firmware with the most advanced features! A user manual is provided.
- Download and install the latest version of the Gateway Update Software.
- The program will walk you through step-by-step to upgrade your Gatway (internet connection is required for update)
- NOTE: once installed the updater will download the most recent FIRMWARE from our servers
- NOTE: The Firmware version may be different from the Gateway Updater version. You will see the most recent Firmware versions in the Gateway Updater Program once a connection to our server is made.
-
Firmware Download, Version 1.0.2.7F (Released on January 4th, 2012)DownloadRelease Notes
Gateway Update Software Package
Contains updater program and user instructions
ISFD75
GateWay Kit for Select Ford
Gateway Firmware Updater
The Gateway Firmware Updater will download the most recent firmware directly from iSimple. Ensuring you have the most up-to-date firmware with the most advanced features! A user manual is provided.
- Download and install the latest version of the Gateway Update Software.
- The program will walk you through step-by-step to upgrade your Gatway (internet connection is required for update)
- NOTE: once installed the updater will download the most recent FIRMWARE from our servers
- NOTE: The Firmware version may be different from the Gateway Updater version. You will see the most recent Firmware versions in the Gateway Updater Program once a connection to our server is made.
-
Firmware Download, Version 1.0.2.7F (Released on January 4th, 2012)DownloadRelease Notes
Gateway Update Software Package
Contains updater program and user instructions

ISGM12
GateWay SAT - Sirius XM GM
-
Firmware Download, Version 1.0.2.7F (Released on January 4th, 2012)DownloadRelease Notes
Gateway Update Software Package
Contains updater program and user instructions
ISGM531
DuaLink Kit for Select GM Vehicles
-
Firmware Download, Version 1.0.2.7F (Released on January 4th, 2012)DownloadRelease Notes
Gateway Update Software Package
Contains updater program and user instructions
ISGM533
DuaLink Kit for Select GM Vehicles
-
Firmware Download, Version 1.0.2.7F (Released on January 4th, 2012)DownloadRelease Notes
Gateway Update Software Package
Contains updater program and user instructions
ISGM535
DuaLink Kit for Select GM Vehicles
-
Firmware Download, Version 1.0.2.7F (Released on January 4th, 2012)DownloadRelease Notes
Gateway Update Software Package
Contains updater program and user instructions
ISGM571
GateWay Kit for Select GM
Gateway Firmware Updater
The Gateway Firmware Updater will download the most recent firmware directly from iSimple. Ensuring you have the most up-to-date firmware with the most advanced features! A user manual is provided.
- Download and install the latest version of the Gateway Update Software.
- The program will walk you through step-by-step to upgrade your Gatway (internet connection is required for update)
- NOTE: once installed the updater will download the most recent FIRMWARE from our servers
- NOTE: The Firmware version may be different from the Gateway Updater version. You will see the most recent Firmware versions in the Gateway Updater Program once a connection to our server is made.
-
Firmware Download, Version 1.0.2.7F (Released on January 4th, 2012)DownloadRelease Notes
Gateway Update Software Package
Contains updater program and user instructions
ISGM572
GateWay Kit for Select GM
Gateway Firmware Updater
The Gateway Firmware Updater will download the most recent firmware directly from iSimple. Ensuring you have the most up-to-date firmware with the most advanced features! A user manual is provided.
- Download and install the latest version of the Gateway Update Software.
- The program will walk you through step-by-step to upgrade your Gatway (internet connection is required for update)
- NOTE: once installed the updater will download the most recent FIRMWARE from our servers
- NOTE: The Firmware version may be different from the Gateway Updater version. You will see the most recent Firmware versions in the Gateway Updater Program once a connection to our server is made.
-
Firmware Download, Version 1.0.2.7F (Released on January 4th, 2012)DownloadRelease Notes
Gateway Update Software Package
Contains updater program and user instructions
ISGM573
GateWay Kit for Select GM
Gateway Firmware Updater
The Gateway Firmware Updater will download the most recent firmware directly from iSimple. Ensuring you have the most up-to-date firmware with the most advanced features! A user manual is provided.
- Download and install the latest version of the Gateway Update Software.
- The program will walk you through step-by-step to upgrade your Gatway (internet connection is required for update)
- NOTE: once installed the updater will download the most recent FIRMWARE from our servers
- NOTE: The Firmware version may be different from the Gateway Updater version. You will see the most recent Firmware versions in the Gateway Updater Program once a connection to our server is made.
-
Firmware Download, Version 1.0.2.7F (Released on January 4th, 2012)DownloadRelease Notes
Gateway Update Software Package
Contains updater program and user instructions
ISGM574
GateWay Kit for Select GM Cadillac
Gateway Firmware Updater
The Gateway Firmware Updater will download the most recent firmware directly from iSimple. Ensuring you have the most up-to-date firmware with the most advanced features! A user manual is provided.
- Download and install the latest version of the Gateway Update Software.
- The program will walk you through step-by-step to upgrade your Gatway (internet connection is required for update)
- NOTE: once installed the updater will download the most recent FIRMWARE from our servers
- NOTE: The Firmware version may be different from the Gateway Updater version. You will see the most recent Firmware versions in the Gateway Updater Program once a connection to our server is made.
-
Firmware Download, Version 1.0.2.7F (Released on January 4th, 2012)DownloadRelease Notes
Gateway Update Software Package
Contains updater program and user instructions
ISGM575
GateWay Kit for Select GM
Gateway Firmware Updater
The Gateway Firmware Updater will download the most recent firmware directly from iSimple. Ensuring you have the most up-to-date firmware with the most advanced features! A user manual is provided.
- Download and install the latest version of the Gateway Update Software.
- The program will walk you through step-by-step to upgrade your Gatway (internet connection is required for update)
- NOTE: once installed the updater will download the most recent FIRMWARE from our servers
- NOTE: The Firmware version may be different from the Gateway Updater version. You will see the most recent Firmware versions in the Gateway Updater Program once a connection to our server is made.
-
Firmware Download, Version 1.0.2.7F (Released on January 4th, 2012)DownloadRelease Notes
Gateway Update Software Package
Contains updater program and user instructions

ISGM651
CONNECT FOR SELECT GM 29-BIT LAN
Installation Instructions
- Save the .zip file to your desktop.
- Once saved to your desktop, right click the .zip file and choose "Extract All".
- Follow the instructions included in the .zip file to update your iSimple Connect.
-
Firmware Download, Version 192a.46a (Released on May 5th, 2014)DownloadRelease Notes
- Resolves intermittent audio issue seen when used with SXV200 tuner
-
Firmware Download, Version 187a.45d (Released on March 22nd, 2013)DownloadRelease Notes
- Adds Honda/Acura applications
- Improves Bluetooth HFP audio
- Fixes Satellite Radio bleedthrough
- Improves general functionality

ISGM652
Connect for Select GM 11 BIT Vehicles
Installation Instructions
- Save the .zip file to your desktop.
- Once saved to your desktop, right click the .zip file and choose "Extract All".
- Follow the instructions included in the .zip file to update your iSimple Connect.
-
Firmware Download, Version 192a.46a (Released on May 5th, 2014)DownloadRelease Notes
- Resolves intermittent audio issue seen when used with SXV200 tuner
-
Firmware Download, Version 187a.45d (Released on March 22nd, 2013)DownloadRelease Notes
- Adds Honda/Acura applications
- Improves Bluetooth HFP audio
- Fixes Satellite Radio bleedthrough
- Improves general functionality
ISGM655
Connect for Select GM Class II Vehicles
Installation Instructions
- Save the .zip file to your desktop.
- Once saved to your desktop, right click the .zip file and choose "Extract All".
- Follow the instructions included in the .zip file to update your iSimple Connect.
-
Firmware Download, Version 192a.46a (Released on May 5th, 2014)DownloadRelease Notes
- Resolves intermittent audio issue seen when used with SXV200 tuner
-
Firmware Download, Version 187a.45d (Released on March 22nd, 2013)DownloadRelease Notes
- Adds Honda/Acura applications
- Improves Bluetooth HFP audio
- Fixes Satellite Radio bleedthrough
- Improves general functionality
ISGM76
Gateway for GM
Gateway Firmware Updater
The Gateway Firmware Updater will download the most recent firmware directly from iSimple. Ensuring you have the most up-to-date firmware with the most advanced features! A user manual is provided.
- Download and install the latest version of the Gateway Update Software.
- The program will walk you through step-by-step to upgrade your Gatway (internet connection is required for update)
- NOTE: once installed the updater will download the most recent FIRMWARE from our servers
- NOTE: The Firmware version may be different from the Gateway Updater version. You will see the most recent Firmware versions in the Gateway Updater Program once a connection to our server is made.
-
Firmware Download, Version 1.0.2.7F (Released on January 4th, 2012)DownloadRelease Notes
Gateway Update Software Package
Contains updater program and user instructions
ISHD12
GateWay Sirius/XM Kit for SXV-100/200 Tuner
-
Firmware Download, Version 1.0.2.7F (Released on January 4th, 2012)DownloadRelease Notes
Gateway Update Software Package
Contains updater program and user instructions

ISHD531
DuaLink Kit for Select Honda and Acura Vehicles
-
Firmware Download, Version 1.0.2.7F (Released on January 4th, 2012)DownloadRelease Notes
Gateway Update Software Package
Contains updater program and user instructions
ISHD571
Media GateWay Kit for Honda, Acura
Gateway Firmware Updater
The Gateway Firmware Updater will download the most recent firmware directly from iSimple. Ensuring you have the most up-to-date firmware with the most advanced features! A user manual is provided.
- Download and install the latest version of the Gateway Update Software.
- The program will walk you through step-by-step to upgrade your Gatway (internet connection is required for update)
- NOTE: once installed the updater will download the most recent FIRMWARE from our servers
- NOTE: The Firmware version may be different from the Gateway Updater version. You will see the most recent Firmware versions in the Gateway Updater Program once a connection to our server is made.
-
Firmware Download, Version 1.0.2.7F (Released on January 4th, 2012)DownloadRelease Notes
Gateway Update Software Package
Contains updater program and user instructions
ISHD651
Connect for Honda and Acura
Installation Instructions
- Save the .zip file to your desktop.
- Once saved to your desktop, right click the .zip file and choose "Extract All".
- Follow the instructions included in the .zip file to update your iSimple Connect.
-
Firmware Download, Version 192a.46a (Released on May 5th, 2014)DownloadRelease Notes
- Resolves intermittent audio issue seen when used with SXV200 tuner
-
Firmware Download, Version 187a.45d (Released on March 22nd, 2013)DownloadRelease Notes
- Adds Honda/Acura applications
- Improves Bluetooth HFP audio
- Fixes Satellite Radio bleedthrough
- Improves general functionality
ISHY571
GateWay Kit for Select Hyundai
Gateway Firmware Updater
The Gateway Firmware Updater will download the most recent firmware directly from iSimple. Ensuring you have the most up-to-date firmware with the most advanced features! A user manual is provided.
- Download and install the latest version of the Gateway Update Software.
- The program will walk you through step-by-step to upgrade your Gatway (internet connection is required for update)
- NOTE: once installed the updater will download the most recent FIRMWARE from our servers
- NOTE: The Firmware version may be different from the Gateway Updater version. You will see the most recent Firmware versions in the Gateway Updater Program once a connection to our server is made.
-
Firmware Download, Version 1.0.2.7F (Released on January 4th, 2012)DownloadRelease Notes
Gateway Update Software Package
Contains updater program and user instructions
ISHY572
DISCONTINUED - GateWay Kit for Select Hyundai
Gateway Firmware Updater
The Gateway Firmware Updater will download the most recent firmware directly from iSimple. Ensuring you have the most up-to-date firmware with the most advanced features! A user manual is provided.
- Download and install the latest version of the Gateway Update Software.
- The program will walk you through step-by-step to upgrade your Gatway (internet connection is required for update)
- NOTE: once installed the updater will download the most recent FIRMWARE from our servers
- NOTE: The Firmware version may be different from the Gateway Updater version. You will see the most recent Firmware versions in the Gateway Updater Program once a connection to our server is made.
-
Firmware Download, Version 1.0.2.7F (Released on January 4th, 2012)DownloadRelease Notes
Gateway Update Software Package
Contains updater program and user instructions
ISIM74
Gateway for Imports
Gateway Firmware Updater
The Gateway Firmware Updater will download the most recent firmware directly from iSimple. Ensuring you have the most up-to-date firmware with the most advanced features! A user manual is provided.
- Download and install the latest version of the Gateway Update Software.
- The program will walk you through step-by-step to upgrade your Gatway (internet connection is required for update)
- NOTE: once installed the updater will download the most recent FIRMWARE from our servers
- NOTE: The Firmware version may be different from the Gateway Updater version. You will see the most recent Firmware versions in the Gateway Updater Program once a connection to our server is made.
-
Firmware Download, Version 1.0.2.7F (Released on January 4th, 2012)DownloadRelease Notes
Gateway Update Software Package
Contains updater program and user instructions

ISMZ571
GateWay Kit for Mazda
Gateway Firmware Updater
The Gateway Firmware Updater will download the most recent firmware directly from iSimple. Ensuring you have the most up-to-date firmware with the most advanced features! A user manual is provided.
- Download and install the latest version of the Gateway Update Software.
- The program will walk you through step-by-step to upgrade your Gatway (internet connection is required for update)
- NOTE: once installed the updater will download the most recent FIRMWARE from our servers
- NOTE: The Firmware version may be different from the Gateway Updater version. You will see the most recent Firmware versions in the Gateway Updater Program once a connection to our server is made.
-
Firmware Download, Version 1.0.2.7F (Released on January 4th, 2012)DownloadRelease Notes
Gateway Update Software Package
Contains updater program and user instructions
ISNI531
DuaLink Kit for Select Nissan Vehicles
-
Firmware Download, Version 1.0.2.7F (Released on January 4th, 2012)DownloadRelease Notes
Gateway Update Software Package
Contains updater program and user instructions
ISNI532
DuaLink Kit for Select Nissan Vehicles
-
Firmware Download, Version 1.0.2.7F (Released on January 4th, 2012)DownloadRelease Notes
Gateway Update Software Package
Contains updater program and user instructions

ISNI571
GateWay Kit for Select Nissan
Gateway Firmware Updater
The Gateway Firmware Updater will download the most recent firmware directly from iSimple. Ensuring you have the most up-to-date firmware with the most advanced features! A user manual is provided.
- Download and install the latest version of the Gateway Update Software.
- The program will walk you through step-by-step to upgrade your Gatway (internet connection is required for update)
- NOTE: once installed the updater will download the most recent FIRMWARE from our servers
- NOTE: The Firmware version may be different from the Gateway Updater version. You will see the most recent Firmware versions in the Gateway Updater Program once a connection to our server is made.
-
Firmware Download, Version 1.0.2.7F (Released on January 4th, 2012)DownloadRelease Notes
Gateway Update Software Package
Contains updater program and user instructions
ISNI572
GateWay Kit for Select Nissan
Gateway Firmware Updater
The Gateway Firmware Updater will download the most recent firmware directly from iSimple. Ensuring you have the most up-to-date firmware with the most advanced features! A user manual is provided.
- Download and install the latest version of the Gateway Update Software.
- The program will walk you through step-by-step to upgrade your Gatway (internet connection is required for update)
- NOTE: once installed the updater will download the most recent FIRMWARE from our servers
- NOTE: The Firmware version may be different from the Gateway Updater version. You will see the most recent Firmware versions in the Gateway Updater Program once a connection to our server is made.
-
Firmware Download, Version 1.0.2.7F (Released on January 4th, 2012)DownloadRelease Notes
Gateway Update Software Package
Contains updater program and user instructions
ISNM71
GateWay for Select Nissan and Mazda
Gateway Firmware Updater
The Gateway Firmware Updater will download the most recent firmware directly from iSimple. Ensuring you have the most up-to-date firmware with the most advanced features! A user manual is provided.
- Download and install the latest version of the Gateway Update Software.
- The program will walk you through step-by-step to upgrade your Gatway (internet connection is required for update)
- NOTE: once installed the updater will download the most recent FIRMWARE from our servers
- NOTE: The Firmware version may be different from the Gateway Updater version. You will see the most recent Firmware versions in the Gateway Updater Program once a connection to our server is made.
-
Firmware Download, Version 1.0.2.7F (Released on January 4th, 2012)DownloadRelease Notes
Gateway Update Software Package
Contains updater program and user instructions

ISSB571
GateWay Kit for Subaru
Gateway Firmware Updater
The Gateway Firmware Updater will download the most recent firmware directly from iSimple. Ensuring you have the most up-to-date firmware with the most advanced features! A user manual is provided.
- Download and install the latest version of the Gateway Update Software.
- The program will walk you through step-by-step to upgrade your Gatway (internet connection is required for update)
- NOTE: once installed the updater will download the most recent FIRMWARE from our servers
- NOTE: The Firmware version may be different from the Gateway Updater version. You will see the most recent Firmware versions in the Gateway Updater Program once a connection to our server is made.
-
Firmware Download, Version 1.0.2.7F (Released on January 4th, 2012)DownloadRelease Notes
Gateway Update Software Package
Contains updater program and user instructions
ISTY531
DuaLink Kit for Select Toyota Vehicles
-
Firmware Download, Version 1.0.2.7F (Released on January 4th, 2012)DownloadRelease Notes
Gateway Update Software Package
Contains updater program and user instructions
ISTY571
GateWay Kit for Toyota
Gateway Firmware Updater
The Gateway Firmware Updater will download the most recent firmware directly from iSimple. Ensuring you have the most up-to-date firmware with the most advanced features! A user manual is provided.
- Download and install the latest version of the Gateway Update Software.
- The program will walk you through step-by-step to upgrade your Gatway (internet connection is required for update)
- NOTE: once installed the updater will download the most recent FIRMWARE from our servers
- NOTE: The Firmware version may be different from the Gateway Updater version. You will see the most recent Firmware versions in the Gateway Updater Program once a connection to our server is made.
-
Firmware Download, Version 1.0.2.7F (Released on January 4th, 2012)DownloadRelease Notes
Gateway Update Software Package
Contains updater program and user instructions

ISTY651
Connect for Select Toyota Vehicles
Installation Instructions
- Save the .zip file to your desktop.
- Once saved to your desktop, right click the .zip file and choose "Extract All".
- Follow the instructions included in the .zip file to update your iSimple Connect.
-
Firmware Download, Version 192a.46a (Released on May 5th, 2014)DownloadRelease Notes
- Resolves intermittent audio issue seen when used with SXV200 tuner
-
Firmware Download, Version 187a.45d (Released on March 22nd, 2013)DownloadRelease Notes
- Adds Honda/Acura applications
- Improves Bluetooth HFP audio
- Fixes Satellite Radio bleedthrough
- Improves general functionality
ISVW532
DISCONTINUED: DuaLink Kit for Select VW Vehicles
-
Firmware Download, Version 1.0.2.7F (Released on January 4th, 2012)DownloadRelease Notes
Gateway Update Software Package
Contains updater program and user instructions
ISVW571
GateWay Kit for VW Jetta
Gateway Firmware Updater
The Gateway Firmware Updater will download the most recent firmware directly from iSimple. Ensuring you have the most up-to-date firmware with the most advanced features! A user manual is provided.
- Download and install the latest version of the Gateway Update Software.
- The program will walk you through step-by-step to upgrade your Gatway (internet connection is required for update)
- NOTE: once installed the updater will download the most recent FIRMWARE from our servers
- NOTE: The Firmware version may be different from the Gateway Updater version. You will see the most recent Firmware versions in the Gateway Updater Program once a connection to our server is made.
-
Firmware Download, Version 1.0.2.7F (Released on January 4th, 2012)DownloadRelease Notes
Gateway Update Software Package
Contains updater program and user instructions

ISVW572
GateWay Kit for VW
Gateway Firmware Updater
The Gateway Firmware Updater will download the most recent firmware directly from iSimple. Ensuring you have the most up-to-date firmware with the most advanced features! A user manual is provided.
- Download and install the latest version of the Gateway Update Software.
- The program will walk you through step-by-step to upgrade your Gatway (internet connection is required for update)
- NOTE: once installed the updater will download the most recent FIRMWARE from our servers
- NOTE: The Firmware version may be different from the Gateway Updater version. You will see the most recent Firmware versions in the Gateway Updater Program once a connection to our server is made.
-
Firmware Download, Version 1.0.2.7F (Released on January 4th, 2012)DownloadRelease Notes
Gateway Update Software Package
Contains updater program and user instructions
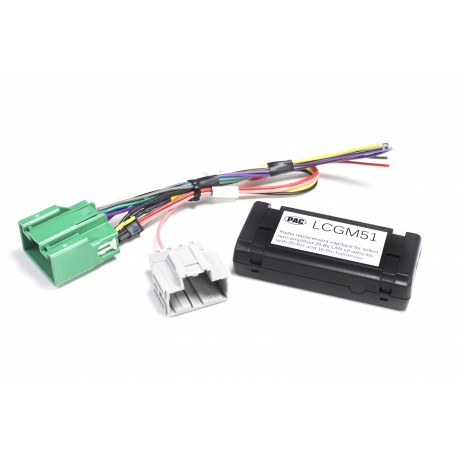
LCGM51
Radio Replacement Interface for Select General Motors Vehicles
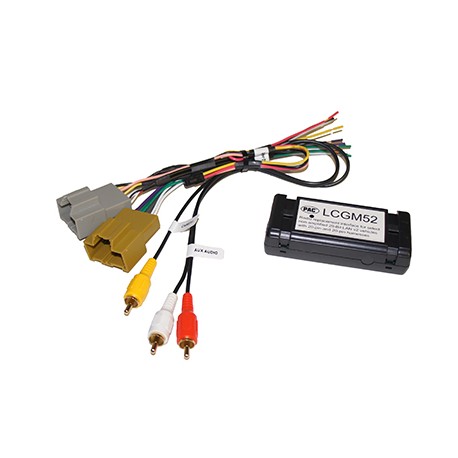
LCGM52
Radio Replacement Interface for Select 2016-2017 GM Trucks
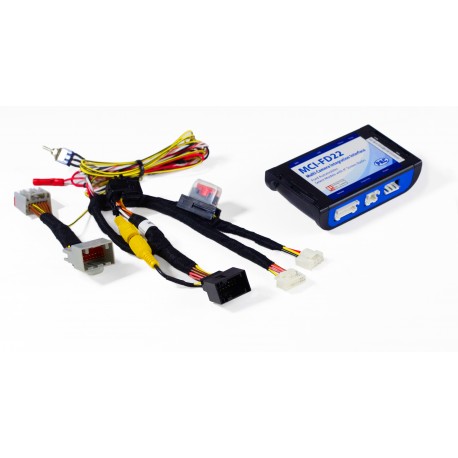
MCI-FD22
Multi-camera interface for select 2016 - 2017 Ford Transit 150, 250, 350, and 2015 - 2017 F-150
-
Utility/Other, Version V5 (Released on June 28th, 2017)DownloadRelease NotesBCI PC Application
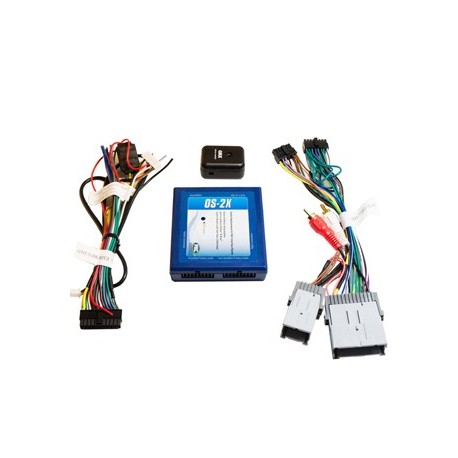
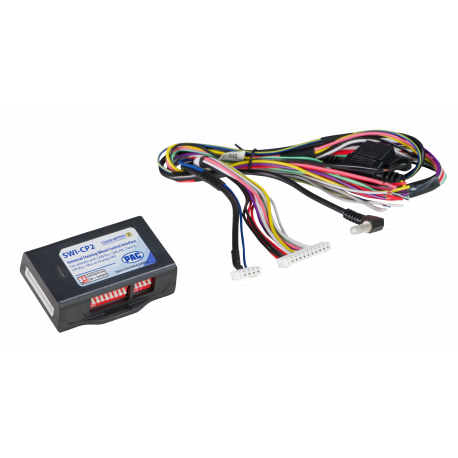
OS-2X
Radio Replacement Interface for select General Motors Vehicles
Installation Instructions
If not updated, download and install the latest version of the PAC-UP firmware. It is VERY important that you use the latest version of Interface Updater. Not doing so may damage the interfaces software.
Detailed Instructions
- If this is the first time, run and install "Interface Updater Setup". This will install "Interface Updater" onto the computer. The "Interface Updater" will update the files from the computer to RP Interface.
- Download the file
- Connect the PAC-UP to the computer using supplied USB cable. Connect the PAC-UP to the RP Interface.
- Open the Interface Updater Program by going to Start >All Programs >AAMP of America > Interface Updater.
- Click "Connect" button to establish connection between the PAC-UP and the computer. The "Connected" check box will be checked if successful. If unsuccessful, reconnect PAC-UP to the computer and restart the software.
- Select your RP Interface from the "Interface select" pull down menu.
- Click "Update firmware". The new firmware can be found where you saved it before beginning.
- Once the files are chosen the update will begin. When successful it will show the text "End Update".
IMPORTANT: It is very important that the second and third digit of the revision number on your module matches the second and third digit of the new firmware file revision number. If your numbers do not match, please contact our tech support department.
-
Firmware Download, Version V6 (Released on November 6th, 2018)DownloadRelease Notes
- Fixes issues seen with accessory output turning off and on randomly
-
Firmware Download, Version 1.1.1.5 (Released on January 19th, 2017)DownloadRelease Notes
- Adds support for SWI-CP2
- Adds support for SWI-CP2
-
Firmware Download, Version v1.1.3 (Released on April 24th, 2015)DownloadRelease Notes
- Fixes issue with SWC output not working
-
Utility/Other, Version 2.6 (Released on July 21st, 2017)DownloadRelease NotesPAC-UP Interface Updater
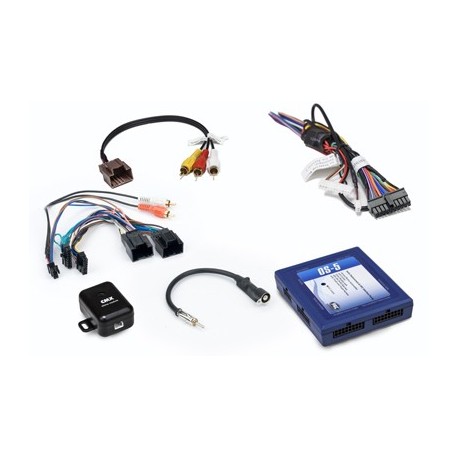
OS-5
Radio Replacement Interface
-
Firmware Download, Version 1.1.6.5 (Released on January 19th, 2017)DownloadRelease Notes
- Adds support for SWI-CP2
- Adds support for SWI-CP2
-
Firmware Download, Version 1.1.6.4 (Released on May 28th, 2014)DownloadRelease Notes
- Initial Release
-
Utility/Other, Version 2.6 (Released on July 21st, 2017)DownloadRelease NotesPAC-UP Interface Updater
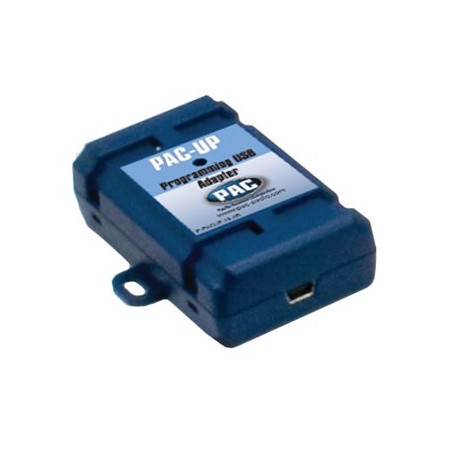
PAC-UP
PAC Interface Updating Device
-
Utility/Other, Version 2.6 (Released on October 12th, 2016)DownloadRelease NotesPAC-UP Interface Updater
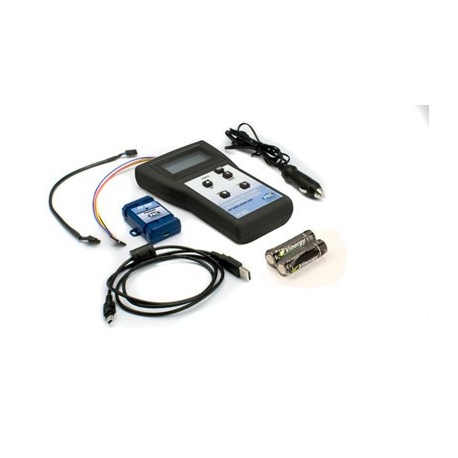
PP-SWI
Hand-held portable SWC module programmer
Installation Notes
- If not updated, download and install the PAC-UP firmware.
- Download and install the latest version of our database.
- Connect the PAC-UP to the computer's USB port and PP-SWI's data port, and install the update.
Detailed Instructions
- If this is the first time updating you PP-SWI, download, run and install the "PAC Interface Updater". This will install "Interface Updater" onto the computer. The "Interface Updater" will update the files from the computer to PP-SWI.
- Download and extract the "PP-SWI Database r--.zip" file. Please remember the location that the .suf file is extracted to. We will need this for step 7.
- Connect the PAC-UP to the computer using supplied USB cable. Connect the PAC-UP to PP-SWI.
- Open the Interface Updater Program by going to Start >All Programs >AAMP of America > Interface Updater.
- Click "Connect" button to establish connection between the PAC-UP and the computer. The "Connected" check box will be checked if successful. If unsuccessful, reconnect PAC-UP to the computer and restart the software.
- Select "PP-SWI" from "Interface select" pull down menu.
- Click "Update Database". Locate the new database file you extracted in step 2 and select it.
- Once the file is chosen the update will begin. When successful it will show the text "End Update". It is now safe to disconnect the PP-SWI / PAC-UP from the computer.
-
Firmware Download, Version r12 (Released on January 31st, 2014)DownloadRelease Notes
- Updated select vehicles to 2014 (select models) for Chrysler, Dodge, Jeep, VW, Kia, Hyundai, Subaru, Mazda, Mitsubishi, Harley, Honda, Acura, General Motors, Nissan, Infiniti, Suzuki, Ford and Lincoln.
-
Utility/Other, Version 1.1.7 (Released on March 5th, 2013)DownloadRelease NotesPAC-UP Firmware
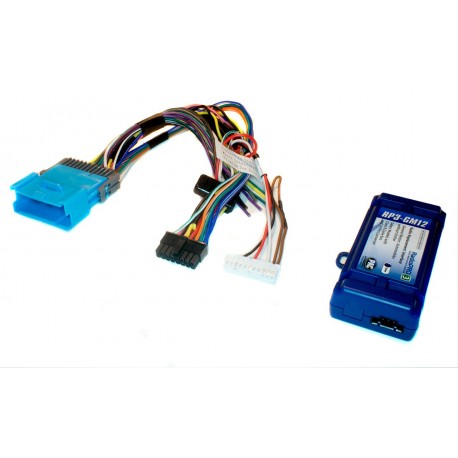
RP3-GM11
RadioPRO3 Interface for Select GM Class II Vehicles
Installation Instructions
If not updated, download and install the latest version of the PAC-UP firmware. It is VERY important that you use the latest version of Interface Updater. Not doing so may damage the interfaces software.
Detailed Instructions
- If this is the first time, run and install "Interface Updater Setup". This will install "Interface Updater" onto the computer. The "Interface Updater" will update the files from the computer to RP Interface.
- Download the file
- Connect the PAC-UP to the computer using supplied USB cable. Connect the PAC-UP to the RP Interface.
- Open the Interface Updater Program by going to Start >All Programs >AAMP of America > Interface Updater.
- Click "Connect" button to establish connection between the PAC-UP and the computer. The "Connected" check box will be checked if successful. If unsuccessful, reconnect PAC-UP to the computer and restart the software.
- Select your RP Interface from the "Interface select" pull down menu.
- Click "Update firmware". The new firmware can be found where you saved it before beginning.
- Once the files are chosen the update will begin. When successful it will show the text "End Update".
IMPORTANT: It is very important that the second and third digit of the revision number on your module matches the second and third digit of the new firmware file revision number. If your numbers do not match, please contact our tech support department.
-
Firmware Download, Version 1.1.7.5 (Released on January 19th, 2017)DownloadRelease Notes
- Adds support for the SWI-CP2
- Adds support for the SWI-CP2
-
Firmware Download, Version 1.1.7.3 (Released on December 6th, 2013)DownloadRelease Notes
- Initial Release
-
Utility/Other, Version 2.6 (Released on July 21st, 2017)DownloadRelease NotesPAC-UP Interface Updater
RP3-GM12
RadioPRO3 Interface for Select GM Class II Vehicles
Installation Instructions
If not updated, download and install the latest version of the PAC-UP firmware. It is VERY important that you use the latest version of Interface Updater. Not doing so may damage the interfaces software.
Detailed Instructions
- If this is the first time, run and install "Interface Updater Setup". This will install "Interface Updater" onto the computer. The "Interface Updater" will update the files from the computer to RP Interface.
- Download the file
- Connect the PAC-UP to the computer using supplied USB cable. Connect the PAC-UP to the RP Interface.
- Open the Interface Updater Program by going to Start >All Programs >AAMP of America > Interface Updater.
- Click "Connect" button to establish connection between the PAC-UP and the computer. The "Connected" check box will be checked if successful. If unsuccessful, reconnect PAC-UP to the computer and restart the software.
- Select your RP Interface from the "Interface select" pull down menu.
- Click "Update firmware". The new firmware can be found where you saved it before beginning.
- Once the files are chosen the update will begin. When successful it will show the text "End Update".
IMPORTANT: It is very important that the second and third digit of the revision number on your module matches the second and third digit of the new firmware file revision number. If your numbers do not match, please contact our tech support department.
-
Firmware Download, Version 1.1.7.5 (Released on January 19th, 2017)DownloadRelease Notes
- Adds support for the SWI-CP2
- Adds support for the SWI-CP2
-
Firmware Download, Version 1.1.7.3 (Released on December 6th, 2013)DownloadRelease Notes
- Initial Release
-
Utility/Other, Version 2.6 (Released on July 21st, 2017)DownloadRelease NotesPAC-UP Interface Updater

RP3-GM13
RadioPRO3 Interface for Select GM Class II Vehicles
Installation Instructions
If not updated, download and install the latest version of the PAC-UP firmware. It is VERY important that you use the latest version of Interface Updater. Not doing so may damage the interfaces software.
Detailed Instructions
- If this is the first time, run and install "Interface Updater Setup". This will install "Interface Updater" onto the computer. The "Interface Updater" will update the files from the computer to RP Interface.
- Download the file
- Connect the PAC-UP to the computer using supplied USB cable. Connect the PAC-UP to the RP Interface.
- Open the Interface Updater Program by going to Start >All Programs >AAMP of America > Interface Updater.
- Click "Connect" button to establish connection between the PAC-UP and the computer. The "Connected" check box will be checked if successful. If unsuccessful, reconnect PAC-UP to the computer and restart the software.
- Select your RP Interface from the "Interface select" pull down menu.
- Click "Update firmware". The new firmware can be found where you saved it before beginning.
- Once the files are chosen the update will begin. When successful it will show the text "End Update".
IMPORTANT: It is very important that the second and third digit of the revision number on your module matches the second and third digit of the new firmware file revision number. If your numbers do not match, please contact our tech support department.
-
Firmware Download, Version 1.1.7.2 (Released on January 26th, 2017)DownloadRelease Notes
- Adds support for the SWI-CP2
-
Firmware Download, Version 1.1.7.1 (Released on October 15th, 2014)DownloadRelease Notes
- Initial Release
-
Utility/Other, Version 2.6 (Released on July 21st, 2017)DownloadRelease NotesPAC-UP Interface Updater
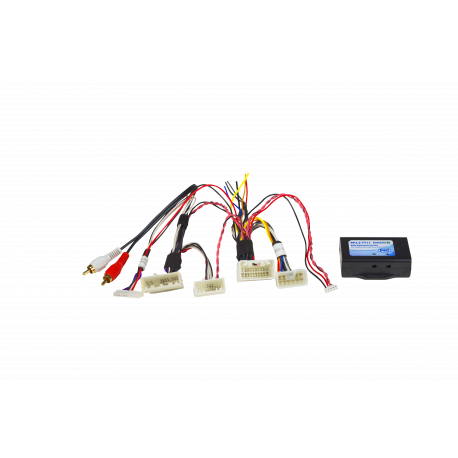
RP3.2-TY11
RadioPRO 3 Radio Replacement Interface for select Toyota vehicles
Installation Instructions
- Download the latest version of the RadioPRO PC Application. It is VERY important that you use the latest version.
- Download the latest version of our firmware.
- Extract the firmware file from the .ZIP file that was just downloaded.
- Connect the interface to the computer's USB port and install the update.
Detailed Instructions
- If this is the first time using the RadioPRO PC Application, run and install “radiopro_setup.exe”. This will install the PC Application onto the computer. The RadioPRO program will then install the update files from the computer to RP Interface.
- Download the firmware file.
- Connect the RP3.2 interface to the computer using a standard to micro USB cable.
- Open the RadioPRO PC Application using the new shortcut created on your desktop.
- Click the "Firmware" icon.
- Click “Select File” and browse to the new firmware file. The new firmware can be found where you saved it before beginning.
- Once the file is chosen the update will begin. When successful it will show the text "Update Completed".
-
Firmware Download, Version V4 (Released on September 28th, 2017)DownloadRelease Notes-Added missing amp turn on message for IEBus
-Fixed avalon with nav and 2nd gen prius (latency of startup with BL and hanging on screen init)
-Linker file adjusted for RAM -
Utility/Other, Version V14 (Released on October 23rd, 2017)DownloadRelease NotesRadioPRO PC Application
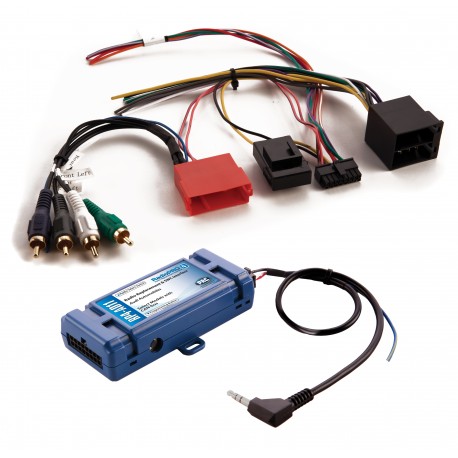
RP4-AD11
RadioPRO4 Interface for Audi Vehicles with CAN bus
Installation Instructions
If not updated, download and install the latest version of the PAC-UP firmware. It is VERY important that you use the latest version of Interface Updater. Not doing so may damage the interfaces software.
Detailed Instructions
- If this is the first time, run and install "Interface Updater Setup". This will install "Interface Updater" onto the computer. The "Interface Updater" will update the files from the computer to RP Interface.
- Download the file
- Connect the PAC-UP to the computer using supplied USB cable. Connect the PAC-UP to the RP Interface.
- Open the Interface Updater Program by going to Start >All Programs >AAMP of America > Interface Updater.
- Click "Connect" button to establish connection between the PAC-UP and the computer. The "Connected" check box will be checked if successful. If unsuccessful, reconnect PAC-UP to the computer and restart the software.
- Select your RP Interface from the "Interface select" pull down menu.
- Click "Update firmware". The new firmware can be found where you saved it before beginning.
- Once the files are chosen the update will begin. When successful it will show the text "End Update".
IMPORTANT: It is very important that the second and third digit of the revision number on your module matches the second and third digit of the new firmware file revision number. If your numbers do not match, please contact our tech support department.
-
Firmware Download, Version 1.5.4.4 (Released on February 3rd, 2015)DownloadRelease Notes
- Adds Fusion
- Separates Sony & Pioneer
- Adds Alpine VR command
- Fixes LED problem without proper radio selection
-
Firmware Download, Version 1.2.3.3 (Released on May 14th, 2013)DownloadRelease Notes
- Adds short press long press dual command functionality for SWC
- Fixes issues seen with SWC when used with new Alpine & JVC head units
- Adds new Kenwood Bluetooth function support for SWC
-
Firmware Download, Version 1.1.3 (Released on January 30th, 2013)DownloadRelease Notes
- Adds support for Fusion radio.
- Improves overall functionality
-
Firmware Download, Version 1.1.2 (Released on June 4th, 2012)DownloadRelease Notes
- Improves general functionality
- Improves general functionality
-
Firmware Download, Version 1.1.1 (Released on April 5th, 2012)DownloadRelease Notes
- Initial Release
-
Utility/Other, Version 2.6 (Released on July 21st, 2017)DownloadRelease NotesPAC-UP Interface Updater
RP4-CH11
RadioPRO4 Interface for select Chrysler/Dodge/Jeep/RAM Vehicles
Installation Instructions
If not updated, download and install the latest version of the PAC-UP firmware. It is VERY important that you use the latest version of Interface Updater. Not doing so may damage the interfaces software.
Detailed Instructions
- If this is the first time, run and install "Interface Updater Setup". This will install "Interface Updater" onto the computer. The "Interface Updater" will update the files from the computer to RP Interface.
- Download the file
- Connect the PAC-UP to the computer using supplied USB cable. Connect the PAC-UP to the RP Interface.
- Open the Interface Updater Program by going to Start >All Programs >AAMP of America > Interface Updater.
- Click "Connect" button to establish connection between the PAC-UP and the computer. The "Connected" check box will be checked if successful. If unsuccessful, reconnect PAC-UP to the computer and restart the software.
- Select your RP Interface from the "Interface select" pull down menu.
- Click "Update firmware". The new firmware can be found where you saved it before beginning.
- Once the files are chosen the update will begin. When successful it will show the text "End Update".
IMPORTANT: It is very important that the second and third digit of the revision number on your module matches the second and third digit of the new firmware file revision number. If your numbers do not match, please contact our tech support department.
-
Firmware Download, Version 1.5.4.5 (Released on May 9th, 2018)DownloadRelease Notes
- Adds default functions for "Voice" button on SWC to launch Siri or the Google equivalent
- Adds default functions for "Voice" button on SWC to launch Siri or the Google equivalent
-
Firmware Download, Version 1.5.4.4 (Released on February 13th, 2015)DownloadRelease Notes
- Adds Fusion
- Separates Sony & Pioneer
- Adds Alpine VR command
- Factory amp turn-on delay slightly longer to avoid turn-on pop
- Fixes LED problem without proper radio selection
-
Firmware Download, Version 1.2.3.3 (Released on May 10th, 2013)DownloadRelease Notes
- Adds short press long press dual command functionality for SWC
- Fixes issues seen with SWC when used with new Alpine & JVC head units
- Adds new Kenwood Bluetooth function support for SWC
- Adds SWC support for Fusion radios
- Fixes issues seen with reverse output on manual transmission vehicles
- Fixes issues seen with turn on pop in vehicles with factory amplified systems
-
Firmware Download, Version 1.1.2 (Released on June 4th, 2012)DownloadRelease Notes
- Fixes reverse output falsely triggering when vehicle is in RAP mode.
- Fixes digital amplifier not turning on in pre 2010 vehicles
-
Firmware Download, Version 1.1.1a (Released on April 14th, 2012)DownloadRelease Notes
- The reverse trigger falsely triggering when in RAP mode
- Digital amplifiers not turning on in 2009 and earlier LSFT vehicles
- Adds SWC text to multifunction display in cluster
-
Firmware Download, Version 1.1.1 (Released on April 5th, 2012)DownloadRelease Notes
- Initial Release
-
Utility/Other, Version 2.6 (Released on July 21st, 2017)DownloadRelease NotesPAC-UP Interface Updater
RP4-CH21
RadioPRO4 Interface for Chrysler Vehicles with CAN bus
Installation Instructions
If not updated, download and install the latest version of the PAC-UP firmware. It is VERY important that you use the latest version of Interface Updater. Not doing so may damage the interfaces software.
Detailed Instructions
- If this is the first time, run and install "Interface Updater Setup". This will install "Interface Updater" onto the computer. The "Interface Updater" will update the files from the computer to RP Interface.
- Download the file
- Connect the PAC-UP to the computer using supplied USB cable. Connect the PAC-UP to the RP Interface.
- Open the Interface Updater Program by going to Start >All Programs >AAMP of America > Interface Updater.
- Click "Connect" button to establish connection between the PAC-UP and the computer. The "Connected" check box will be checked if successful. If unsuccessful, reconnect PAC-UP to the computer and restart the software.
- Select your RP Interface from the "Interface select" pull down menu.
- Click "Update firmware". The new firmware can be found where you saved it before beginning.
- Once the files are chosen the update will begin. When successful it will show the text "End Update".
IMPORTANT: It is very important that the second and third digit of the revision number on your module matches the second and third digit of the new firmware file revision number. If your numbers do not match, please contact our tech support department.
-
Firmware Download, Version 5.1.2 (Released on February 13th, 2015)DownloadRelease Notes
- Adds Alpine VR command
-
Utility/Other, Version 2.6 (Released on July 21st, 2017)DownloadRelease NotesPAC-UP Interface Updater
-
Utility/Other, Version V3 (Released on June 16th, 2014)DownloadRelease NotesVehicle Settings Application
RP4-FD11
RadioPRO4 Interface for Ford Vehicles with CAN bus
Installation Instructions
If not updated, download and install the latest version of the PAC-UP firmware. It is VERY important that you use the latest version of Interface Updater. Not doing so may damage the interfaces software.
Detailed Instructions
- If this is the first time, run and install "Interface Updater Setup". This will install "Interface Updater" onto the computer. The "Interface Updater" will update the files from the computer to RP Interface.
- Download the file
- Connect the PAC-UP to the computer using supplied USB cable. Connect the PAC-UP to the RP Interface.
- Open the Interface Updater Program by going to Start >All Programs >AAMP of America > Interface Updater.
- Click "Connect" button to establish connection between the PAC-UP and the computer. The "Connected" check box will be checked if successful. If unsuccessful, reconnect PAC-UP to the computer and restart the software.
- Select your RP Interface from the "Interface select" pull down menu.
- Click "Update firmware". The new firmware can be found where you saved it before beginning.
- Once the files are chosen the update will begin. When successful it will show the text "End Update".
IMPORTANT: It is very important that the second and third digit of the revision number on your module matches the second and third digit of the new firmware file revision number. If your numbers do not match, please contact our tech support department.
-
Firmware Download, Version 1.5.4.5 (Released on June 23rd, 2015)DownloadRelease Notes
- Adds 2013-2016 Ford Super Duty applications
- Adds 2013-2016 Ford Super Duty applications
-
Firmware Download, Version 1.5.4.4 (Released on February 13th, 2015)DownloadRelease Notes
- Adds Fusion
- Separates Sony & Pioneer
- Adds Alpine VR command
- Fixes LED problem without proper radio selection
-
Firmware Download, Version 1.2.3.3 (Released on May 10th, 2013)DownloadRelease Notes
- Adds short press long press dual command functionality for SWC
- Fixes issues seen with SWC when used with new Alpine & JVC head units
- Adds new Kenwood Bluetooth function support for SWC
- Fixes issues with Reverse, Parking Break, and Illumination not working in older vehicles
- Adds re-calibration of OE Steering Wheel Controls to accommodate other vehicles and to improve SWC detection
-
Firmware Download, Version 1.1.2 (Released on June 4th, 2012)DownloadRelease Notes
- Fixes THX amplifier not turning on in 2012+ Lincoln Navigator
-
Firmware Download, Version 1.1.1 (Released on April 5th, 2012)DownloadRelease Notes
- Initial Release
-
Utility/Other, Version 2.6 (Released on July 21st, 2017)DownloadRelease NotesPAC-UP Interface Updater
RP4-GM11
RadioPRO4 Interface for General Motors Vehicles with Class II Data bus
Installation Instructions
If not updated, download and install the latest version of the PAC-UP firmware. It is VERY important that you use the latest version of Interface Updater. Not doing so may damage the interfaces software.
Detailed Instructions
- If this is the first time, run and install "Interface Updater Setup". This will install "Interface Updater" onto the computer. The "Interface Updater" will update the files from the computer to RP Interface.
- Download the file
- Connect the PAC-UP to the computer using supplied USB cable. Connect the PAC-UP to the RP Interface.
- Open the Interface Updater Program by going to Start >All Programs >AAMP of America > Interface Updater.
- Click "Connect" button to establish connection between the PAC-UP and the computer. The "Connected" check box will be checked if successful. If unsuccessful, reconnect PAC-UP to the computer and restart the software.
- Select your RP Interface from the "Interface select" pull down menu.
- Click "Update firmware". The new firmware can be found where you saved it before beginning.
- Once the files are chosen the update will begin. When successful it will show the text "End Update".
IMPORTANT: It is very important that the second and third digit of the revision number on your module matches the second and third digit of the new firmware file revision number. If your numbers do not match, please contact our tech support department.
-
Firmware Download, Version 1.4.7.8 (Released on February 13th, 2015)DownloadRelease Notes
- Separates Sony & Pioneer
- Adds Alpine VR command
-
Firmware Download, Version 1.3.7.6 (Released on September 19th, 2013)DownloadRelease Notes
- Improved chimes.
- Seat belt chime improved on 2005 vehicles.
- Fixes issues seen with illumination output when hi beams are on.
- Improved SWC's on 2011-13 Corvette.
- Adds Sony BT control.
- Improves reliability in Hummer H2
-
Utility/Other, Version 2.6 (Released on July 21st, 2017)DownloadRelease NotesPAC-UP Interface Updater
RP4-GM31
RadioPRO4 Interface for General Motors Vehicles with GM LAN 29 Bit Data bus
Installation Instructions
If not updated, download and install the latest version of the PAC-UP firmware. It is VERY important that you use the latest version of Interface Updater. Not doing so may damage the interfaces software.
Detailed Instructions
- If this is the first time, run and install "Interface Updater Setup". This will install "Interface Updater" onto the computer. The "Interface Updater" will update the files from the computer to RP Interface.
- Download the file
- Connect the PAC-UP to the computer using supplied USB cable. Connect the PAC-UP to the RP Interface.
- Open the Interface Updater Program by going to Start >All Programs >AAMP of America > Interface Updater.
- Click "Connect" button to establish connection between the PAC-UP and the computer. The "Connected" check box will be checked if successful. If unsuccessful, reconnect PAC-UP to the computer and restart the software.
- Select your RP Interface from the "Interface select" pull down menu.
- Click "Update firmware". The new firmware can be found where you saved it before beginning.
- Once the files are chosen the update will begin. When successful it will show the text "End Update".
IMPORTANT: It is very important that the second and third digit of the revision number on your module matches the second and third digit of the new firmware file revision number. If your numbers do not match, please contact our tech support department.
-
Firmware Download, Version 1.2.3a.8 (Released on February 13th, 2015)DownloadRelease Notes
- Separates Sony & Pioneer
- Adds Alpine VR command
- Fixes LED problem when using SWC
-
Firmware Download, Version 1.2.3a.4 (Released on May 29th, 2013)DownloadRelease Notes
- Fixes issues seen with SWC when used with new Alpine & JVC head units
- Adds new Kenwood Bluetooth function support for SWC
-
Firmware Download, Version 1.1.2a (Released on December 21st, 2012)DownloadRelease Notes
- Improves chime tone and reliability of default SWC programming
-
Firmware Download, Version 1.1.1d (Released on April 13th, 2012)DownloadRelease Notes
- Resolves intermittent factory amp turn-on issue
-
Firmware Download, Version 1.1.1c (Released on April 5th, 2012)DownloadRelease Notes
- Initial release
-
Utility/Other, Version 2.6 (Released on July 21st, 2017)DownloadRelease NotesPAC-UP Interface Updater
RP4-GM32
RadioPRO4 Interface for General Motors Vehicles with GM LAN 29 Bit Data bus
Installation Instructions
If not updated, download and install the latest version of the PAC-UP firmware. It is VERY important that you use the latest version of Interface Updater. Not doing so may damage the interfaces software.
Detailed Instructions
- If this is the first time, run and install "Interface Updater Setup". This will install "Interface Updater" onto the computer. The "Interface Updater" will update the files from the computer to RP Interface.
- Download the file
- Connect the PAC-UP to the computer using supplied USB cable. Connect the PAC-UP to the RP Interface.
- Open the Interface Updater Program by going to Start >All Programs >AAMP of America > Interface Updater.
- Click "Connect" button to establish connection between the PAC-UP and the computer. The "Connected" check box will be checked if successful. If unsuccessful, reconnect PAC-UP to the computer and restart the software.
- Select your RP Interface from the "Interface select" pull down menu.
- Click "Update firmware". The new firmware can be found where you saved it before beginning.
- Once the files are chosen the update will begin. When successful it will show the text "End Update".
IMPORTANT: It is very important that the second and third digit of the revision number on your module matches the second and third digit of the new firmware file revision number. If your numbers do not match, please contact our tech support department.
-
Firmware Download, Version 1.2.3a.8 (Released on February 13th, 2015)DownloadRelease Notes
- Separates Sony & Pioneer
- Adds Alpine VR command
- Fixes LED problem when using SWC
-
Firmware Download, Version 1.2.3a.4 (Released on May 29th, 2013)DownloadRelease Notes
- Fixes issues seen with SWC when used with new Alpine & JVC head units
- Adds new Kenwood Bluetooth function support for SWC
-
Firmware Download, Version 1.1.2a (Released on December 21st, 2012)DownloadRelease Notes
- Improves chime tone and reliability of default SWC programming
-
Utility/Other, Version 2.6 (Released on July 21st, 2017)DownloadRelease NotesPAC-UP Interface Updater
RP4-GM41
RadioPRO4 Interface for General Motors Vehicles with 29-Bit LAN v2
Installation Instructions
Download and install the latest version of PAC Vehicle Settings App PC Software
Detailed Instructions
- Save the Vehicle Settings App .zip file to your desktop.
- Once saved to your desktop, right click the .zip file and choose "Extract All".
- Follow the instructions included in the .zip file to change your vehicle settings
- Before installing firmware, it is very important that the second and third digit of the revision number on your module matches the second and third digit of the new file revision number. If your numbers do not match, please contact our tech support department.
-
Firmware Download, Version 1.2.3a.4 (Released on February 13th, 2015)DownloadRelease Notes
- Separates Sony & Pioneer
- Adds Alpine VR command
- Fixes LED problem when using SWC
-
Utility/Other, Version 2.0.8 (Released on October 12th, 2016)DownloadRelease Notes
PAC Vehicle Settings App (PC)
Software designed to change the vehicle settings directly from a PC.
- Added RP5-GM4101 compatibility
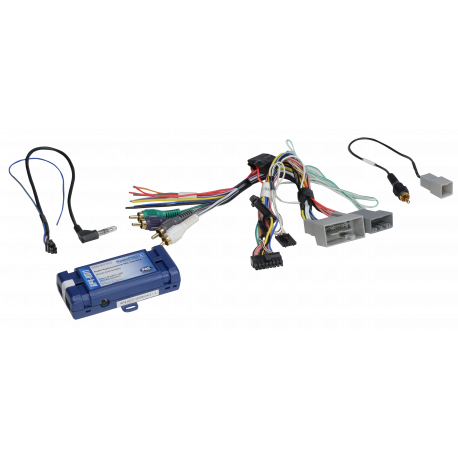
RP4-HD11
RadioPRO4 Interface for Select Honda Vehicles with MSCAN
Installation Instructions
If not updated, download and install the latest version of the PAC-UP firmware. It is VERY important that you use the latest version of Interface Updater. Not doing so may damage the interfaces software.
Detailed Instructions
- If this is the first time, run and install "Interface Updater Setup". This will install "Interface Updater" onto the computer. The "Interface Updater" will update the files from the computer to RP Interface.
- Download the file
- Connect the PAC-UP to the computer using supplied USB cable. Connect the PAC-UP to the RP Interface.
- Open the Interface Updater Program by going to Start >All Programs >AAMP of America > Interface Updater.
- Click "Connect" button to establish connection between the PAC-UP and the computer. The "Connected" check box will be checked if successful. If unsuccessful, reconnect PAC-UP to the computer and restart the software.
- Select your RP Interface from the "Interface select" pull down menu.
- Click "Update firmware". The new firmware can be found where you saved it before beginning.
- Once the files are chosen the update will begin. When successful it will show the text "End Update".
IMPORTANT: It is very important that the second and third digit of the revision number on your module matches the second and third digit of the new firmware file revision number. If your numbers do not match, please contact our tech support department.
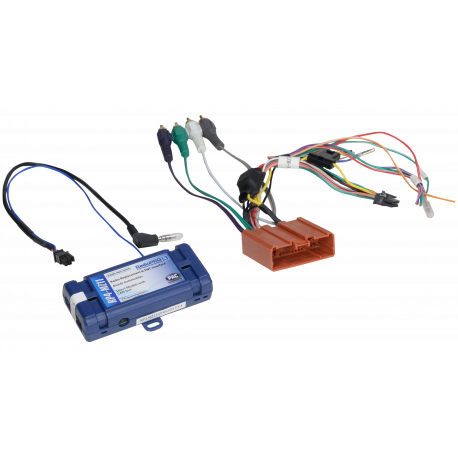
RP4-MZ11
RadioPRO4 Interface
Installation Instructions
If not updated, download and install the latest version of the PAC-UP firmware. It is VERY important that you use the latest version of Interface Updater. Not doing so may damage the interfaces software.
Detailed Instructions
- If this is the first time, run and install "Interface Updater Setup". This will install "Interface Updater" onto the computer. The "Interface Updater" will update the files from the computer to RP Interface.
- Download the file
- Connect the PAC-UP to the computer using supplied USB cable. Connect the PAC-UP to the RP Interface.
- Open the Interface Updater Program by going to Start >All Programs >AAMP of America > Interface Updater.
- Click "Connect" button to establish connection between the PAC-UP and the computer. The "Connected" check box will be checked if successful. If unsuccessful, reconnect PAC-UP to the computer and restart the software.
- Select your RP Interface from the "Interface select" pull down menu.
- Click "Update firmware". The new firmware can be found where you saved it before beginning.
- Once the files are chosen the update will begin. When successful it will show the text "End Update".
IMPORTANT: It is very important that the second and third digit of the revision number on your module matches the second and third digit of the new firmware file revision number. If your numbers do not match, please contact our tech support department.
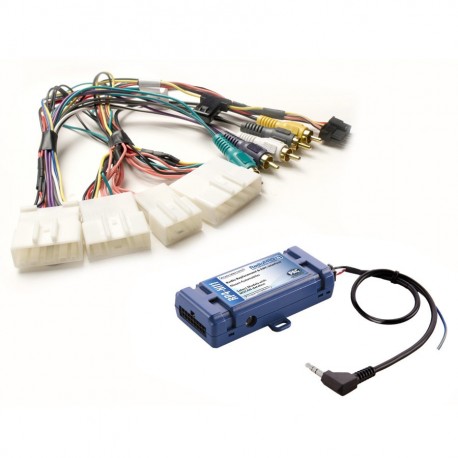
RP4-NI11
RadioPRO4 Interface for Nissan Vehicles with MSCAN
Installation Instructions
If not updated, download and install the latest version of the PAC-UP firmware. It is VERY important that you use the latest version of Interface Updater. Not doing so may damage the interfaces software.
Detailed Instructions
- If this is the first time, run and install "Interface Updater Setup". This will install "Interface Updater" onto the computer. The "Interface Updater" will update the files from the computer to RP Interface.
- Download the file
- Connect the PAC-UP to the computer using supplied USB cable. Connect the PAC-UP to the RP Interface.
- Open the Interface Updater Program by going to Start >All Programs >AAMP of America > Interface Updater.
- Click "Connect" button to establish connection between the PAC-UP and the computer. The "Connected" check box will be checked if successful. If unsuccessful, reconnect PAC-UP to the computer and restart the software.
- Select your RP Interface from the "Interface select" pull down menu.
- Click "Update firmware". The new firmware can be found where you saved it before beginning.
- Once the files are chosen the update will begin. When successful it will show the text "End Update".
IMPORTANT: It is very important that the second and third digit of the revision number on your module matches the second and third digit of the new firmware file revision number. If your numbers do not match, please contact our tech support department.
-
Firmware Download, Version 5.1.4 (Released on February 13th, 2015)DownloadRelease Notes
- Adds Alpine VR command
- Fixes LED problem without proper radio selection
- Fixes issues seen with SWC text on DIC
-
Utility/Other, Version 2.6 (Released on July 21st, 2017)DownloadRelease NotesPAC-UP Interface Updater
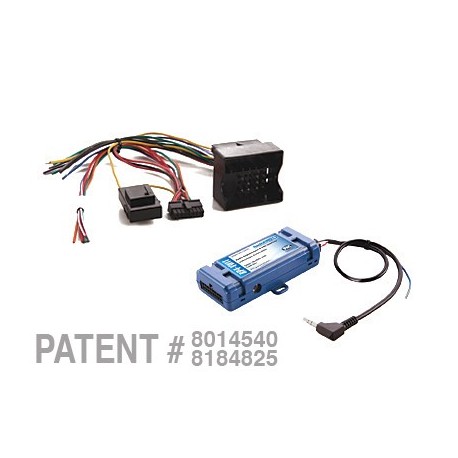
RP4-VW11
RadioPRO4 Interface for VW Vehicles with CAN bus
Installation Instructions
If not updated, download and install the latest version of the PAC-UP firmware. It is VERY important that you use the latest version of Interface Updater. Not doing so may damage the interfaces software.
Detailed Instructions
- If this is the first time, run and install "Interface Updater Setup". This will install "Interface Updater" onto the computer. The "Interface Updater" will update the files from the computer to RP Interface.
- Download the file
- Connect the PAC-UP to the computer using supplied USB cable. Connect the PAC-UP to the RP Interface.
- Open the Interface Updater Program by going to Start >All Programs >AAMP of America > Interface Updater.
- Click "Connect" button to establish connection between the PAC-UP and the computer. The "Connected" check box will be checked if successful. If unsuccessful, reconnect PAC-UP to the computer and restart the software.
- Select your RP Interface from the "Interface select" pull down menu.
- Click "Update firmware". The new firmware can be found where you saved it before beginning.
- Once the files are chosen the update will begin. When successful it will show the text "End Update".
IMPORTANT: It is very important that the second and third digit of the revision number on your module matches the second and third digit of the new firmware file revision number. If your numbers do not match, please contact our tech support department.
-
Firmware Download, Version 1.5.4.7 (Released on May 9th, 2018)DownloadRelease Notes
- Adds default functions for "Voice" button on SWC to launch Siri or the Google equivalent
- Adds default functions for "Voice" button on SWC to launch Siri or the Google equivalent
-
Firmware Download, Version 1.5.4.6 (Released on February 13th, 2015)DownloadRelease Notes
- Adds Alpine VR command
-
Firmware Download, Version 1.2.3.4 (Released on May 14th, 2013)DownloadRelease Notes
- Adds short press long press dual command functionality for SWC
- Fixes issues seen with SWC when used with new Alpine & JVC head units
- Adds new Kenwood Bluetooth function support for SWC
-
Firmware Download, Version 1.1.3 (Released on January 30th, 2013)DownloadRelease Notes
- Adds support for Fusion radio
- Improves overall functionality
-
Firmware Download, Version 1.1.2 (Released on June 4th, 2012)DownloadRelease Notes
- Fixes volume down SWC not working in select pre 2007 vehicles
-
Firmware Download, Version 1.1.1 (Released on April 5th, 2012)DownloadRelease Notes
- Initial release
-
Utility/Other, Version 2.6 (Released on July 21st, 2017)DownloadRelease NotesPAC-UP Interface Updater
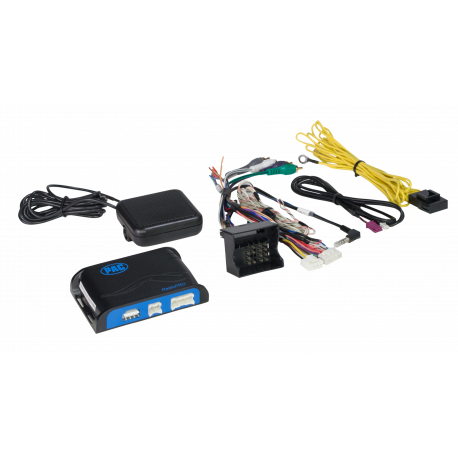
RP4.2-BM21
RadioPRO4 Radio Replacement Interface with Built-in Pre-Programmed Steering Wheel Control Retention and Navigation Outputs
Installation Instructions
- Download the latest version of the RadioPRO PC Application. It is VERY important that you use the latest version.
- Download the latest version of our firmware.
- Extract the firmware file from the .ZIP file that was just downloaded.
Detailed Instructions
- If this is the first time using the RadioPRO PC Application, run and install “radiopro_setup.exe”. This will install the PC Application onto the computer.
- Connect the RP4.2 interface to the computer using a standard to micro USB cable.
- Open the RadioPRO PC Application using the new shortcut created on your desktop.
- Click the "Firmware" icon.
- Click “Select File” and browse to the new firmware file. The new firmware can be found where you saved it before beginning.
- Once the file is chosen the update will begin. When successful it will show the text "Update Completed".
-
Firmware Download, Version 01.00.05 (Released on June 7th, 2016)DownloadRelease Notes
- Fixed chimes
- Fixed VSS in 2015 cars
- Added front park assist retention
-
Firmware Download, Version 01.00.03 (Released on August 5th, 2015)DownloadRelease Notes
- Initial Release
-
Utility/Other, Version V14 (Released on October 23rd, 2017)DownloadRelease NotesRadioPRO PC Application
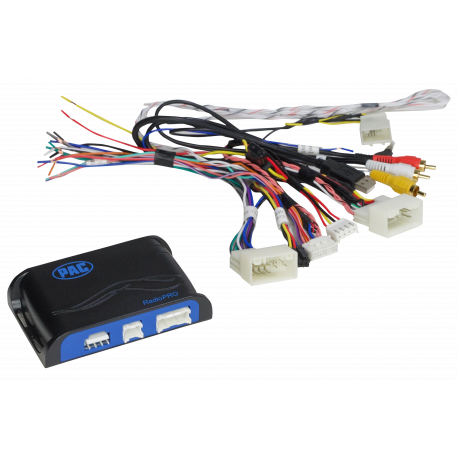
RP4.2-HY11
RadioPRO4 Radio Replacement Interface for Select Hyundai Vehicles
Installation Instructions
- Download the latest version of the RadioPRO PC Application. It is VERY important that you use the latest version.
- Download the latest version of our firmware.
- Extract the firmware file from the .ZIP file that was just downloaded..
Detailed Instructions
- If this is the first time using the RadioPRO PC Application, run and install “radiopro_setup.exe”. This will install the PC Application onto the computer.
- Download the firmware file.
- Set all four dipswitches to the on (down) position.
- Connect the RP4.2 interface to the computer using a standard to micro USB cable.
- Open the RadioPRO PC Application using the new shortcut created on your desktop.
- Click the "Firmware" icon.
- Click “Select File” and browse to the new firmware file. The new firmware can be found where you saved it before beginning.
- Once the file is chosen the update will begin. When successful it will show the text "Update Completed".
-
Firmware Download, Version V17 (Released on September 27th, 2018)DownloadRelease Notes
- Fixes issues seen with steering wheel controls
- Updated radio commands library
- Removes parking brake bypass output logic from red/white wire
-
Firmware Download, Version 01.0.11 (Released on June 5th, 2015)DownloadRelease Notes
- Initial Release
-
Utility/Other, Version V14 (Released on October 23rd, 2017)DownloadRelease NotesRadioPRO PC Application
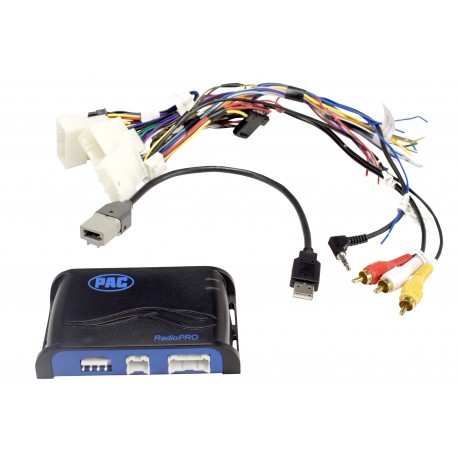
RP4.2-HY12
RadioPRO4 Radio Replacement Interface for Select Hyundai Vehicles
Installation Instructions
- Download the latest version of the RadioPRO PC Application. It is VERY important that you use the latest version.
- Download the latest version of our firmware.
- Extract the firmware file from the .ZIP file that was just downloaded.
Detailed Instructions
- If this is the first time using the RadioPRO PC Application, run and install “radiopro_setup.exe”. This will install the PC Application onto the computer.
- Download the firmware file.
- Connect the RP4.2 interface to the computer using a standard to micro USB cable.
- Open the RadioPRO PC Application using the new shortcut created on your desktop.
- Click the "Firmware" icon.
- Click “Select File” and browse to the new firmware file. The new firmware can be found where you saved it before beginning.
- Once the file is chosen the update will begin. When successful it will show the text "Update Completed".
-
Firmware Download, Version V17 (Released on September 27th, 2018)DownloadRelease Notes
- Fixes issues seen with steering wheel controls
- Updated radio commands library
- Removes parking brake bypass output logic from red/white wire
-
Firmware Download, Version 01.0.11 (Released on June 5th, 2015)DownloadRelease Notes
- Initial Release
-
Utility/Other, Version V14 (Released on October 23rd, 2017)DownloadRelease NotesRadioPRO PC Application
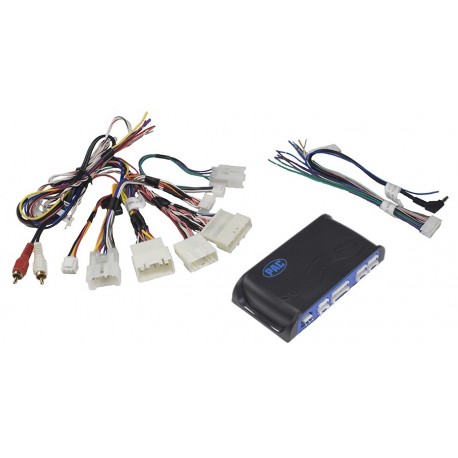
RP4.2-TY11
RadioPRO 4 Radio Replacement Interface for select Toyota vehicles
Installation Instructions
- Download the latest version of the RadioPRO PC Application. It is VERY important that you use the latest version.
- Download the latest version of our firmware.
- Extract the installer and the firmware file from the .zip files that were just downloaded.
- Connect the interface to the computer's USB port and install the update.
Detailed Instructions
- If this is the first time using the RadioPRO PC Application, download “radiopro_setup.zip”.
- Extract the file, then run the installer. This will install the PC Application onto the computer.
- Download the firmware file.
- Set all four dipswitches to the on (down) position.
- Connect the RP4.2 interface to the computer using a standard to micro USB cable.
- Open the RadioPRO PC Application using the new shortcut created on your desktop.
- Click the "Firmware" icon.
- Click “Select File” and browse to the new firmware file. The new firmware can be found where you saved it before beginning.
- Once the file is chosen the update will begin. When successful it will show the text "Update Completed".
-
Firmware Download, Version 46 (Released on September 25th, 2018)DownloadRelease Notes
- Updated radio commands library
- Improves general functionality
-
Firmware Download, Version V43 (Released on February 5th, 2018)DownloadRelease Notes
- Fixes USB connection issues with Windows 8 and 10
- Fixes issues seen with illumination data/no audio on start in Avalon
- Changes default SWC settings for Clarion and Sony from Mute to VR
-
Firmware Download, Version V37 (Released on September 21st, 2017)DownloadRelease Notes
- Fixed issue when factory radio is removed in off state
- Fixed issue when factory radio is removed with volume at 0
- Changed programmable output to be on with Acc to power factory camera
- Fixed issue when factory radio is removed in off state
-
Firmware Download, Version V35 (Released on August 28th, 2017)DownloadRelease Notes
- Fixed recalibration mode missing from push button
- Fixed programmable 12V output
- Fixes for avalon with nav
- Fixed recalibration mode missing from push button
-
Firmware Download, Version 1.1.1.34 (Released on April 5th, 2017)DownloadRelease NotesFixes upper display and amplifier turn on issues seen in the Toyota Avalon with Nav.
-
Firmware Download, Version 1.1.1.33 (Released on July 20th, 2016)DownloadRelease NotesFixes upper display issues seen in the Toyota Avalon with or without JBL.
-
Firmware Download, Version 01.00.32 (Released on July 14th, 2016)DownloadRelease Notes
- Fixes turn on issues seen with JBL amplifiers.
- Fixes turn on issues seen with JBL amplifiers.
-
Firmware Download, Version 01.00.21 (Released on December 29th, 2015)DownloadRelease Notes
- Initial Release
-
Utility/Other, Version V14 (Released on October 23rd, 2017)DownloadRelease NotesRadioPRO PC Application
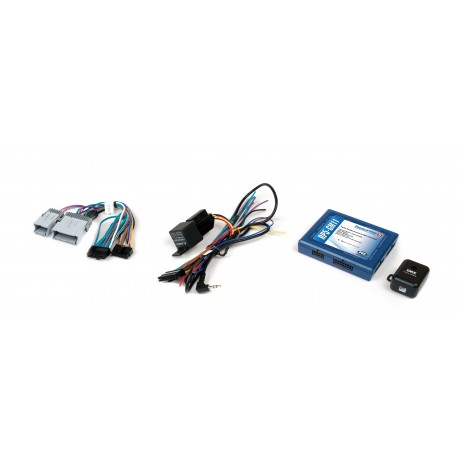
RP5-GM11
RadioPRO Radio Replacement Interface for Select General Motors Vehicles
Installation Instructions
If not updated, download and install the latest version of the PAC-UP firmware. It is VERY important that you use the latest version of Interface Updater. Not doing so may damage the interfaces software.
Detailed Instructions
- If this is the first time, run and install "Interface Updater Setup". This will install "Interface Updater" onto the computer. The "Interface Updater" will update the files from the computer to RP Interface.
- Download the file
- Connect the PAC-UP to the computer using supplied USB cable. Connect the PAC-UP to the RP Interface.
- Open the Interface Updater Program by going to Start >All Programs >AAMP of America > Interface Updater.
- Click "Connect" button to establish connection between the PAC-UP and the computer. The "Connected" check box will be checked if successful. If unsuccessful, reconnect PAC-UP to the computer and restart the software.
- Select your RP Interface from the "Interface select" pull down menu.
- Click "Update firmware". The new firmware can be found where you saved it before beginning.
- Once the files are chosen the update will begin. When successful it will show the text "End Update".
IMPORTANT: It is very important that the second and third digit of the revision number on your module matches the second and third digit of the new firmware file revision number. If your numbers do not match, please contact our tech support department.
-
Firmware Download, Version 1.2.6.13 (Released on June 1st, 2018)DownloadRelease Notes
- Updated Radio Commands Library
-
Firmware Download, Version 1.2.6.8 (Released on February 13th, 2015)DownloadRelease Notes
- Separates Sony & Pioneer
- Adds Alpine VR command
-
Firmware Download, Version 1.2.6.6 (Released on September 19th, 2013)DownloadRelease Notes
- Fixes issues with chimes seen in LaCrosse and Corvette
- Fixes parking brake output in LaCrosse
-
Firmware Download, Version 1.2.5.4 (Released on July 24th, 2013)DownloadRelease Notes
- Corrects no OnStar audio in non-premium amplified vehicles
- Improves seat belt chimes in 2005 and newer vehicles
- Corrects illumination output trigger when Hi-beams are on
- Improves steering wheel controls general operation
-
Utility/Other, Version 2.6 (Released on July 21st, 2017)DownloadRelease NotesPAC-UP Interface Updater
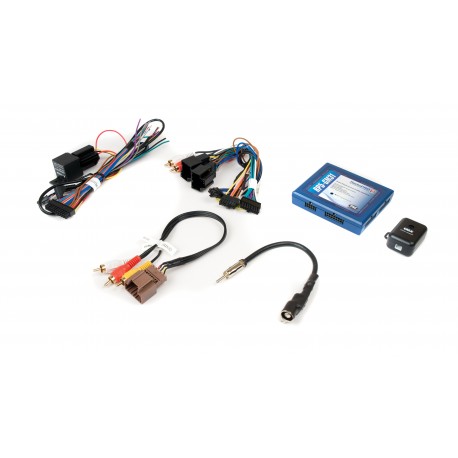
RP5-GM31
RadioPRO Radio Replacement Interface for Select General Motors Vehicles
Installation Instructions
If not updated, download and install the latest version of the PAC-UP firmware. It is VERY important that you use the latest version of Interface Updater. Not doing so may damage the interfaces software.
Detailed Instructions
- If this is the first time, run and install "Interface Updater Setup". This will install "Interface Updater" onto the computer. The "Interface Updater" will update the files from the computer to RP Interface.
- Download the file
- Connect the PAC-UP to the computer using supplied USB cable. Connect the PAC-UP to the RP Interface.
- Open the Interface Updater Program by going to Start >All Programs >AAMP of America > Interface Updater.
- Click "Connect" button to establish connection between the PAC-UP and the computer. The "Connected" check box will be checked if successful. If unsuccessful, reconnect PAC-UP to the computer and restart the software.
- Select your RP Interface from the "Interface select" pull down menu.
- Click "Update firmware". The new firmware can be found where you saved it before beginning.
- Once the files are chosen the update will begin. When successful it will show the text "End Update".
IMPORTANT: It is very important that the second and third digit of the revision number on your module matches the second and third digit of the new firmware file revision number. If your numbers do not match, please contact our tech support department.
-
Firmware Download, Version 1.6.6.19 (Released on October 16th, 2018)DownloadRelease Notes
- Updated radio commands library
- Updated radio commands library
-
Firmware Download, Version 1.6.6.17 (Released on June 1st, 2016)DownloadRelease Notes
- Fixed Aftermarket mode for SWC programming
- Fixed Aftermarket mode for SWC programming
-
Firmware Download, Version 1.6.6.16 (Released on February 13th, 2015)DownloadRelease Notes
- Separates Sony & Pioneer
- Adds Alpine VR command
- Fixes LED problem when using SWC
-
Firmware Download, Version 1.4.4a.4m (Released on April 17th, 2013)DownloadRelease Notes
- Fixes issues seen with interface shutting down every 10 minutes due to OnStar update
- Fixes issues seen with SWC when used with new Alpine & JVC head units
- Adds new Kenwood Bluetooth function support for SWC
-
Firmware Download, Version 1.4.4c (Released on January 30th, 2013)DownloadRelease Notes
- Fixes issues seen with SWC when vehicle is moving
-
Firmware Download, Version 1.4.4 (Released on December 18th, 2012)DownloadRelease Notes
- Improves chime tone and reliability of default SWC programming
-
Firmware Download, Version 1.4.3g (Released on November 30th, 2012)DownloadRelease Notes
- Initial release
-
Utility/Other, Version 2.6 (Released on July 21st, 2017)DownloadRelease NotesPAC-UP Interface Updater
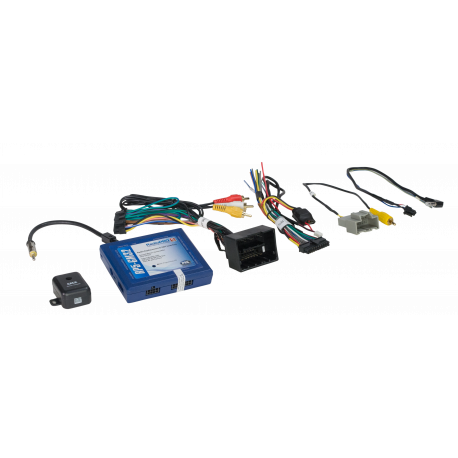
RP5-GM32
RadioPRO Radio Replacement Interface for Select General Motors Vehicles
Installation Instructions
If not updated, download and install the latest version of the PAC-UP firmware. It is VERY important that you use the latest version of Interface Updater. Not doing so may damage the interfaces software.
Detailed Instructions
- If this is the first time, run and install "Interface Updater Setup". This will install "Interface Updater" onto the computer. The "Interface Updater" will update the files from the computer to RP Interface.
- Download the file
- Connect the PAC-UP to the computer using supplied USB cable. Connect the PAC-UP to the RP Interface.
- Open the Interface Updater Program by going to Start >All Programs >AAMP of America > Interface Updater.
- Click "Connect" button to establish connection between the PAC-UP and the computer. The "Connected" check box will be checked if successful. If unsuccessful, reconnect PAC-UP to the computer and restart the software.
- Select your RP Interface from the "Interface select" pull down menu.
- Click "Update firmware". The new firmware can be found where you saved it before beginning.
- Once the files are chosen the update will begin. When successful it will show the text "End Update".
IMPORTANT: It is very important that the second and third digit of the revision number on your module matches the second and third digit of the new firmware file revision number. If your numbers do not match, please contact our tech support department.
-
Firmware Download, Version 1.6.6.17 (Released on June 1st, 2016)DownloadRelease Notes
- Fixed Aftermarket mode for SWC programming
- Fixed Aftermarket mode for SWC programming
-
Firmware Download, Version 1.6.6.16 (Released on February 13th, 2015)DownloadRelease Notes
- Separates Sony & Pioneer
- Adds Alpine VR command
- Fixes LED problem when using SWC
-
Firmware Download, Version 1.6.6.14 (Released on September 17th, 2013)DownloadRelease Notes
- Adds short press/long press dual command functionality
- Improves SWC Factory/Aftermarket Mode selection
- Adds Sony Bluetooth command SWC support (Hardware rev. 6 only)
Fixes issues seen with OnStar volume control from the SWC
-
Firmware Download, Version 1.4.4a.4m (Released on April 17th, 2013)DownloadRelease Notes
- Fixes issues seen with interface shutting down every 10 minutes due to OnStar update
- Fixes issues seen with SWC when used with new Alpine & JVC head units
- Adds new Kenwood Bluetooth function support for SWC
-
Firmware Download, Version 1.4.4c (Released on January 30th, 2013)DownloadRelease Notes
- Fixes issues seen with SWC when vehicle is moving
-
Firmware Download, Version 1.4.4 (Released on December 18th, 2012)DownloadRelease Notes
- Improves chime tone and reliability of default SWC programming
-
Firmware Download, Version 1.4.3g (Released on November 30th, 2012)DownloadRelease Notes
- Initial release
-
Utility/Other, Version 2.6 (Released on July 21st, 2017)DownloadRelease NotesPAC-UP Interface Updater
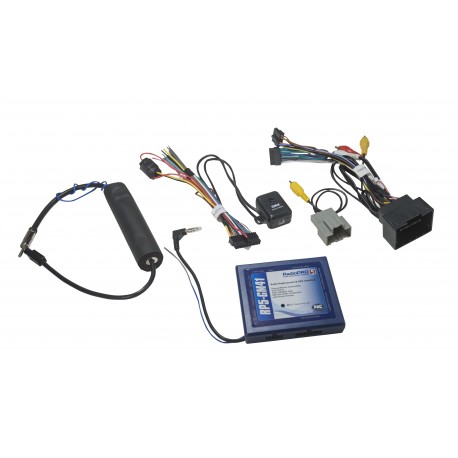
RP5-GM41
RadioPRO Radio Replacement Interface for Select General Motors Vehicles
Installation Instructions
Download and install the latest version of PAC Vehicle Settings App PC Software
Detailed Instructions
- Save the Vehicle Settings App .zip file to your desktop.
- Once saved to your desktop, right click the .zip file and choose "Extract All".
- Follow the instructions included in the .zip file to change your vehicle settings
- Before installing firmware, it is very important that the second and third digit of the revision number on your module matches the second and third digit of the new file revision number. If your numbers do not match, please contact our tech support department.
-
Firmware Download, Version 1.5.6.6 (Released on February 13th, 2015)DownloadRelease Notes
- Separates Sony & Pioneer
- Adds Alpine VR command
- Fixes LED problem when using SWC
-
Firmware Download, Version 1.4.4a.3 (Released on May 22nd, 2013)DownloadRelease Notes
- Fixes issues seen with SWC when vehicle is in motion
- Adds new Kenwood Bluetooth function support for SWC
-
Utility/Other, Version 2.6 (Released on July 21st, 2017)DownloadRelease NotesPAC-UP Interface Updater
-
Utility/Other, Version 2.0.8 (Released on October 12th, 2016)DownloadRelease Notes
PAC Vehicle Settings App (PC)
Software designed to change the vehicle settings directly from a PC. A PAC-UP interface is required to use this software.
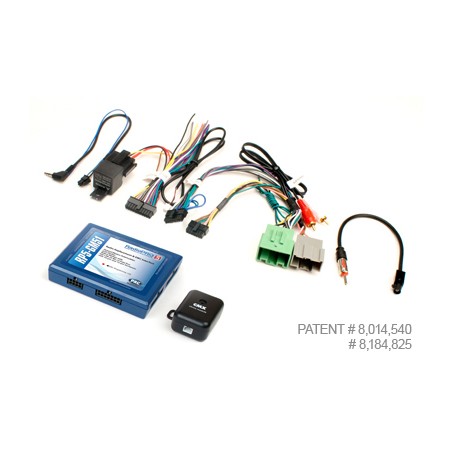
RP5-GM51
RadioPRO Radio Replacement Interface for Select General Motors Vehicles
Installation Instructions
Download and install the latest version of PAC Vehicle Settings App PC Software
Detailed Instructions
- Save the Vehicle Settings App .zip file to your desktop.
- Once saved to your desktop, right click the .zip file and choose "Extract All".
- Follow the instructions included in the .zip file to change your vehicle settings
- Before installing firmware, it is very important that the second and third digit of the revision number on your module matches the second and third digit of the new file revision number. If your numbers do not match, please contact our tech support department.
-
Firmware Download, Version 1.1.6 (Released on March 20th, 2017)DownloadRelease Notes
- Adds 2016/2017 vehicle compatibility
- Adds Sony and Clarion VR support
- Adds 2016/2017 vehicle compatibility
-
Firmware Download, Version 1.1.4 (Released on February 13th, 2015)DownloadRelease Notes
- Added GM-LAN SWC for Colorado
- Added Alpine VR command
- Added auto defog settingg for Tahoe
-
Firmware Download, Version 1.1.3 (Released on May 6th, 2014)DownloadRelease Notes
- Added 2015 Tahoe/Suburban/Yukon compatibility
-
Utility/Other, Version 2.6 (Released on July 14th, 2017)DownloadRelease NotesPAC-UP Interface Updater
-
Utility/Other, Version 2.0.11 (Released on March 20th, 2017)DownloadRelease Notes
PAC Vehicle Settings App (PC)
Software designed to change the vehicle settings directly from a PC.
- Adds new vehicle settings
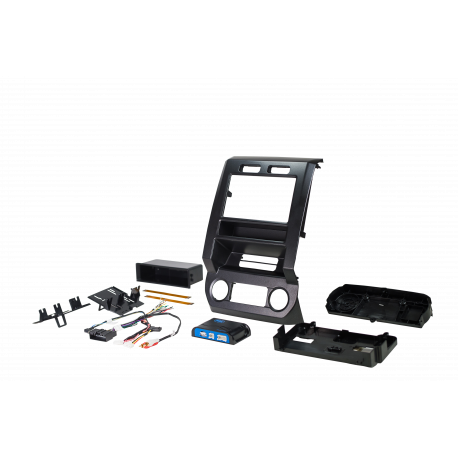
RPK4-FD2201
Ford Integrated Radio Replacement Kit
-
Firmware Download, Version V7 (Released on April 3rd, 2018)DownloadRelease Notes
- Adds user configurable BlindSpot and Front Camera Modes via RadioPRO PC application
- Fixes intermittent SWC issues
- Fixes USB issues seen with Windows 8
-
Utility/Other, Version V14 (Released on April 3rd, 2018)DownloadRelease NotesRadioPRO PC Application
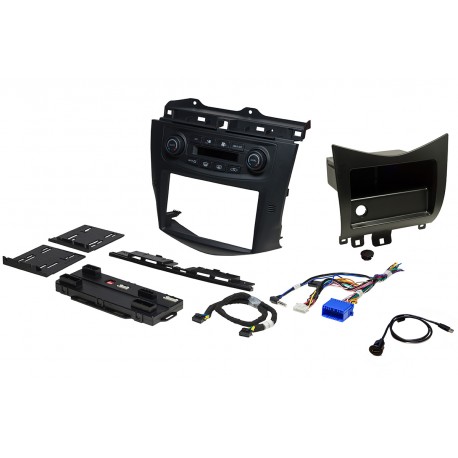
RPK4-HD1101
Honda Integrated Radio Replacement Kit
INSTALLATION INSTRUCTIONS
- Download the latest version of the RadioPRO PC Application. It is VERY important that you use the latest version.
- Download the latest version of our firmware.
- Extract the firmware file from the .ZIP file that was just downloaded.
- Connect the interface to the computer's USB port and install the update.
DETAILED INSTRUCTIONS
- If this is the first time using the RadioPRO PC Application, run and install “RadioPRO_Setup.exe”. This will install the PC Application onto the computer. The RadioPRO program will then install the update files from the computer to RP Interface.
- Download the firmware file.
- Set all four dipswitches to the on (down) position.
- Connect the RP4.2 interface to the computer using a standard to micro USB cable.
- Open the RadioPRO PC Application using the new shortcut created on your desktop.
- Click the "Firmware" icon.
- Click “Select File” and browse to the new firmware file. The new firmware can be found where you saved it before beginning.
- Once the file is chosen the update will begin. When successful it will show the text "Update Completed".
-
Firmware Download, Version V13 (Released on August 17th, 2018)DownloadRelease Notes
- Fixes issues seen with upper display
- Adds upper display selection mode
- Adds hybrid single/dual zone selection for HVAC
- Improves general functionality
-
Firmware Download, Version V8 (Released on January 26th, 2018)DownloadRelease Notes
- Now displays current programmed version when entering programming mode.
- Adds ability to do master reset.
-
Utility/Other, Version V14 (Released on October 23rd, 2017)DownloadRelease NotesRadioPRO PC Application
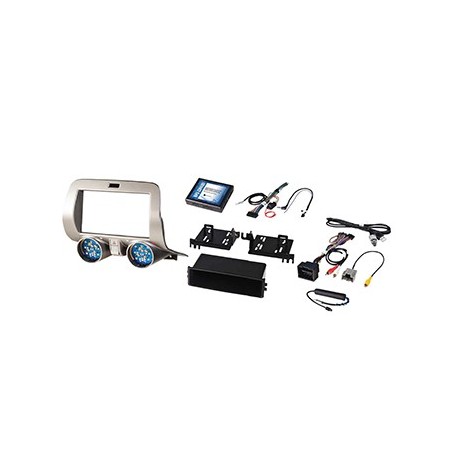
RPK5-GM4101
Integrated Installation Kit
Installation Instructions
If not updated, download and install the latest version of the PAC-UP firmware. It is VERY important that you use the latest version of Interface Updater. Not doing so may damage the interfaces software.
Detailed Instructions
- If this is the first time, run and install "Interface Updater Setup". This will install "Interface Updater" onto the computer. The "Interface Updater" will update the files from the computer to RP Interface.
- Download the file
- Connect the PAC-UP to the computer using supplied USB cable. Connect the PAC-UP to the RP Interface.
- Open the Interface Updater Program by going to Start >All Programs >AAMP of America > Interface Updater.
- Click "Connect" button to establish connection between the PAC-UP and the computer. The "Connected" check box will be checked if successful. If unsuccessful, reconnect PAC-UP to the computer and restart the software.
- Select your RP Interface from the "Interface select" pull down menu.
- Click "Update firmware". The new firmware can be found where you saved it before beginning.
- Once the files are chosen the update will begin. When successful it will show the text "End Update".
IMPORTANT: It is very important that the second and third digit of the revision number on your module matches the second and third digit of the new firmware file revision number. If your numbers do not match, please contact our tech support department.
-
Firmware Download, Version 8 (Released on September 29th, 2017)DownloadRelease Notes
- Fixes incorrect celsius display
- This firmware is for the HVAC board in the dash kit
- Fixes incorrect celsius display
-
Firmware Download, Version 6 (Released on July 3rd, 2017)DownloadRelease Notes
- Fixes issues seen with HVAC board becoming inoperable
- This firmware is for the HVAC board in the dash kit
-
Firmware Download, Version 1.5.6.3 (Released on October 12th, 2016)DownloadRelease Notes
- Fixes issues seen with remapping SWC
- This firmware is for the RP5 interface
- Fixes issues seen with remapping SWC
-
Utility/Other, Version 2.6 (Released on July 21st, 2017)DownloadRelease Notes
- PAC-UP Interface Updater Application
- Software used to update RP5 interface
- PAC-UP Interface Updater Application
-
Utility/Other, Version 11 (Released on July 3rd, 2017)DownloadRelease Notes
- RadioPRO PC Application
- Software used to update HVAC board in dash kit
- RadioPRO PC Application
-
Utility/Other, Version 2.0.8 (Released on October 12th, 2016)DownloadRelease Notes
PAC Vehicle Settings App (PC)
Software designed to change the vehicle settings directly from a PC. A PAC-UP interface is required to use this software.
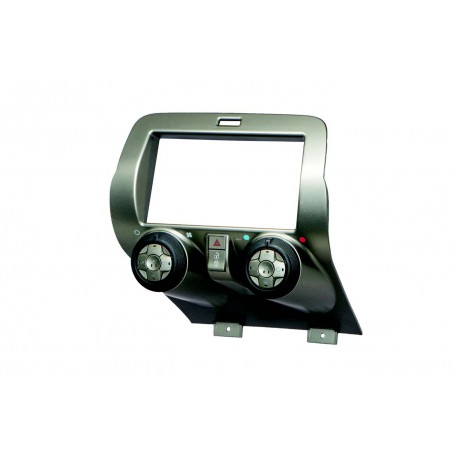
RPK5-GM4102
Integrated Installation Kit
INSTALLATION INSTRUCTIONS
If not updated, download and install the latest version of the PAC-UP firmware. It is VERY important that you use the latest version of Interface Updater. Not doing so may damage the interfaces software.
DETAILED INSTRUCTIONS
- If this is the first time, run and install "Interface Updater Setup". This will install "Interface Updater" onto the computer. The "Interface Updater" will update the files from the computer to RP Interface.
- Download the file
- Connect the PAC-UP to the computer using supplied USB cable. Connect the PAC-UP to the RP Interface.
- Open the Interface Updater Program by going to Start >All Programs >AAMP of America > Interface Updater.
- Click "Connect" button to establish connection between the PAC-UP and the computer. The "Connected" check box will be checked if successful. If unsuccessful, reconnect PAC-UP to the computer and restart the software.
- Select your RP Interface from the "Interface select" pull down menu.
- Click "Update firmware". The new firmware can be found where you saved it before beginning.
- Once the files are chosen the update will begin. When successful it will show the text "End Update".
IMPORTANT: It is very important that the second and third digit of the revision number on your module matches the second and third digit of the new firmware file revision number. If your numbers do not match, please contact our tech support department.
-
Firmware Download, Version 8 (Released on September 27th, 2017)DownloadRelease Notes
- Fixes incorrect celsius display
- This firmware is for the HVAC board in the dash kit
- Fixes incorrect celsius display
-
Firmware Download, Version 6 (Released on July 3rd, 2017)DownloadRelease Notes
- Fixes issues seen with HVAC board becoming inoperable
- This firmware is for the HVAC board in the dash kit
-
Firmware Download, Version 1.5.6.3 (Released on October 12th, 2016)DownloadRelease Notes
- Fixes issues seen with remapping SWC
- This firmware is for the RP5 interface
- Fixes issues seen with remapping SWC
-
Utility/Other, Version 2.6 (Released on July 21st, 2017)DownloadRelease Notes
- PAC-UP Interface Updater Application
- Software used to update RP5 interface
- PAC-UP Interface Updater Application
-
Utility/Other, Version 11 (Released on July 3rd, 2017)DownloadRelease Notes
- RadioPRO PC Application
- Software used to update HVAC board in dash kit
- RadioPRO PC Application
-
Utility/Other, Version 2.0.8 (Released on October 12th, 2016)DownloadRelease Notes
PAC Vehicle Settings App (PC)
Software designed to change the vehicle settings directly from a PC. A PAC-UP interface is required to use this software.